
WarBlock Receiver Height AR15 Gas Block CNC Machining (6): machining fixture plate 2
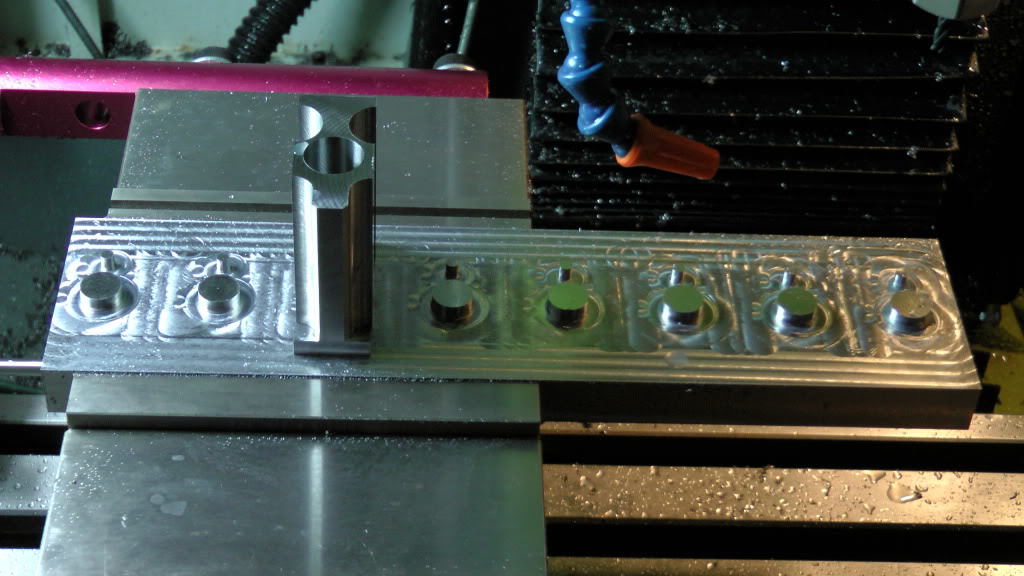
In this episode I machine the 2nd fixture plate alluded to in the last post. It is a similar concept to fixture plate 1 with a few variations as well as improvements that I thought of after machining the first one. This fixture plate is needed to orient the in-process gasblocks into a horizontal position so that I can access the side features; primarily the lightening window, some contours, and the main profile.
The similarities between fixtures 1 and 2 are that they are both designed to be indexable to multiple orientations without un-fixturing the work pieces. For example, as shown in the previous videos fixture 1 holds the the gasblocks in a position that allows access from the front, the top, and the bottom simply by rotating the fixture from being a plate to a tombstone. Fixture 2 allows access to one side, then can be flipped in the vice allowing access to the other side. That is five sides and a heck of a lot cheaper than a 5 axis mill.

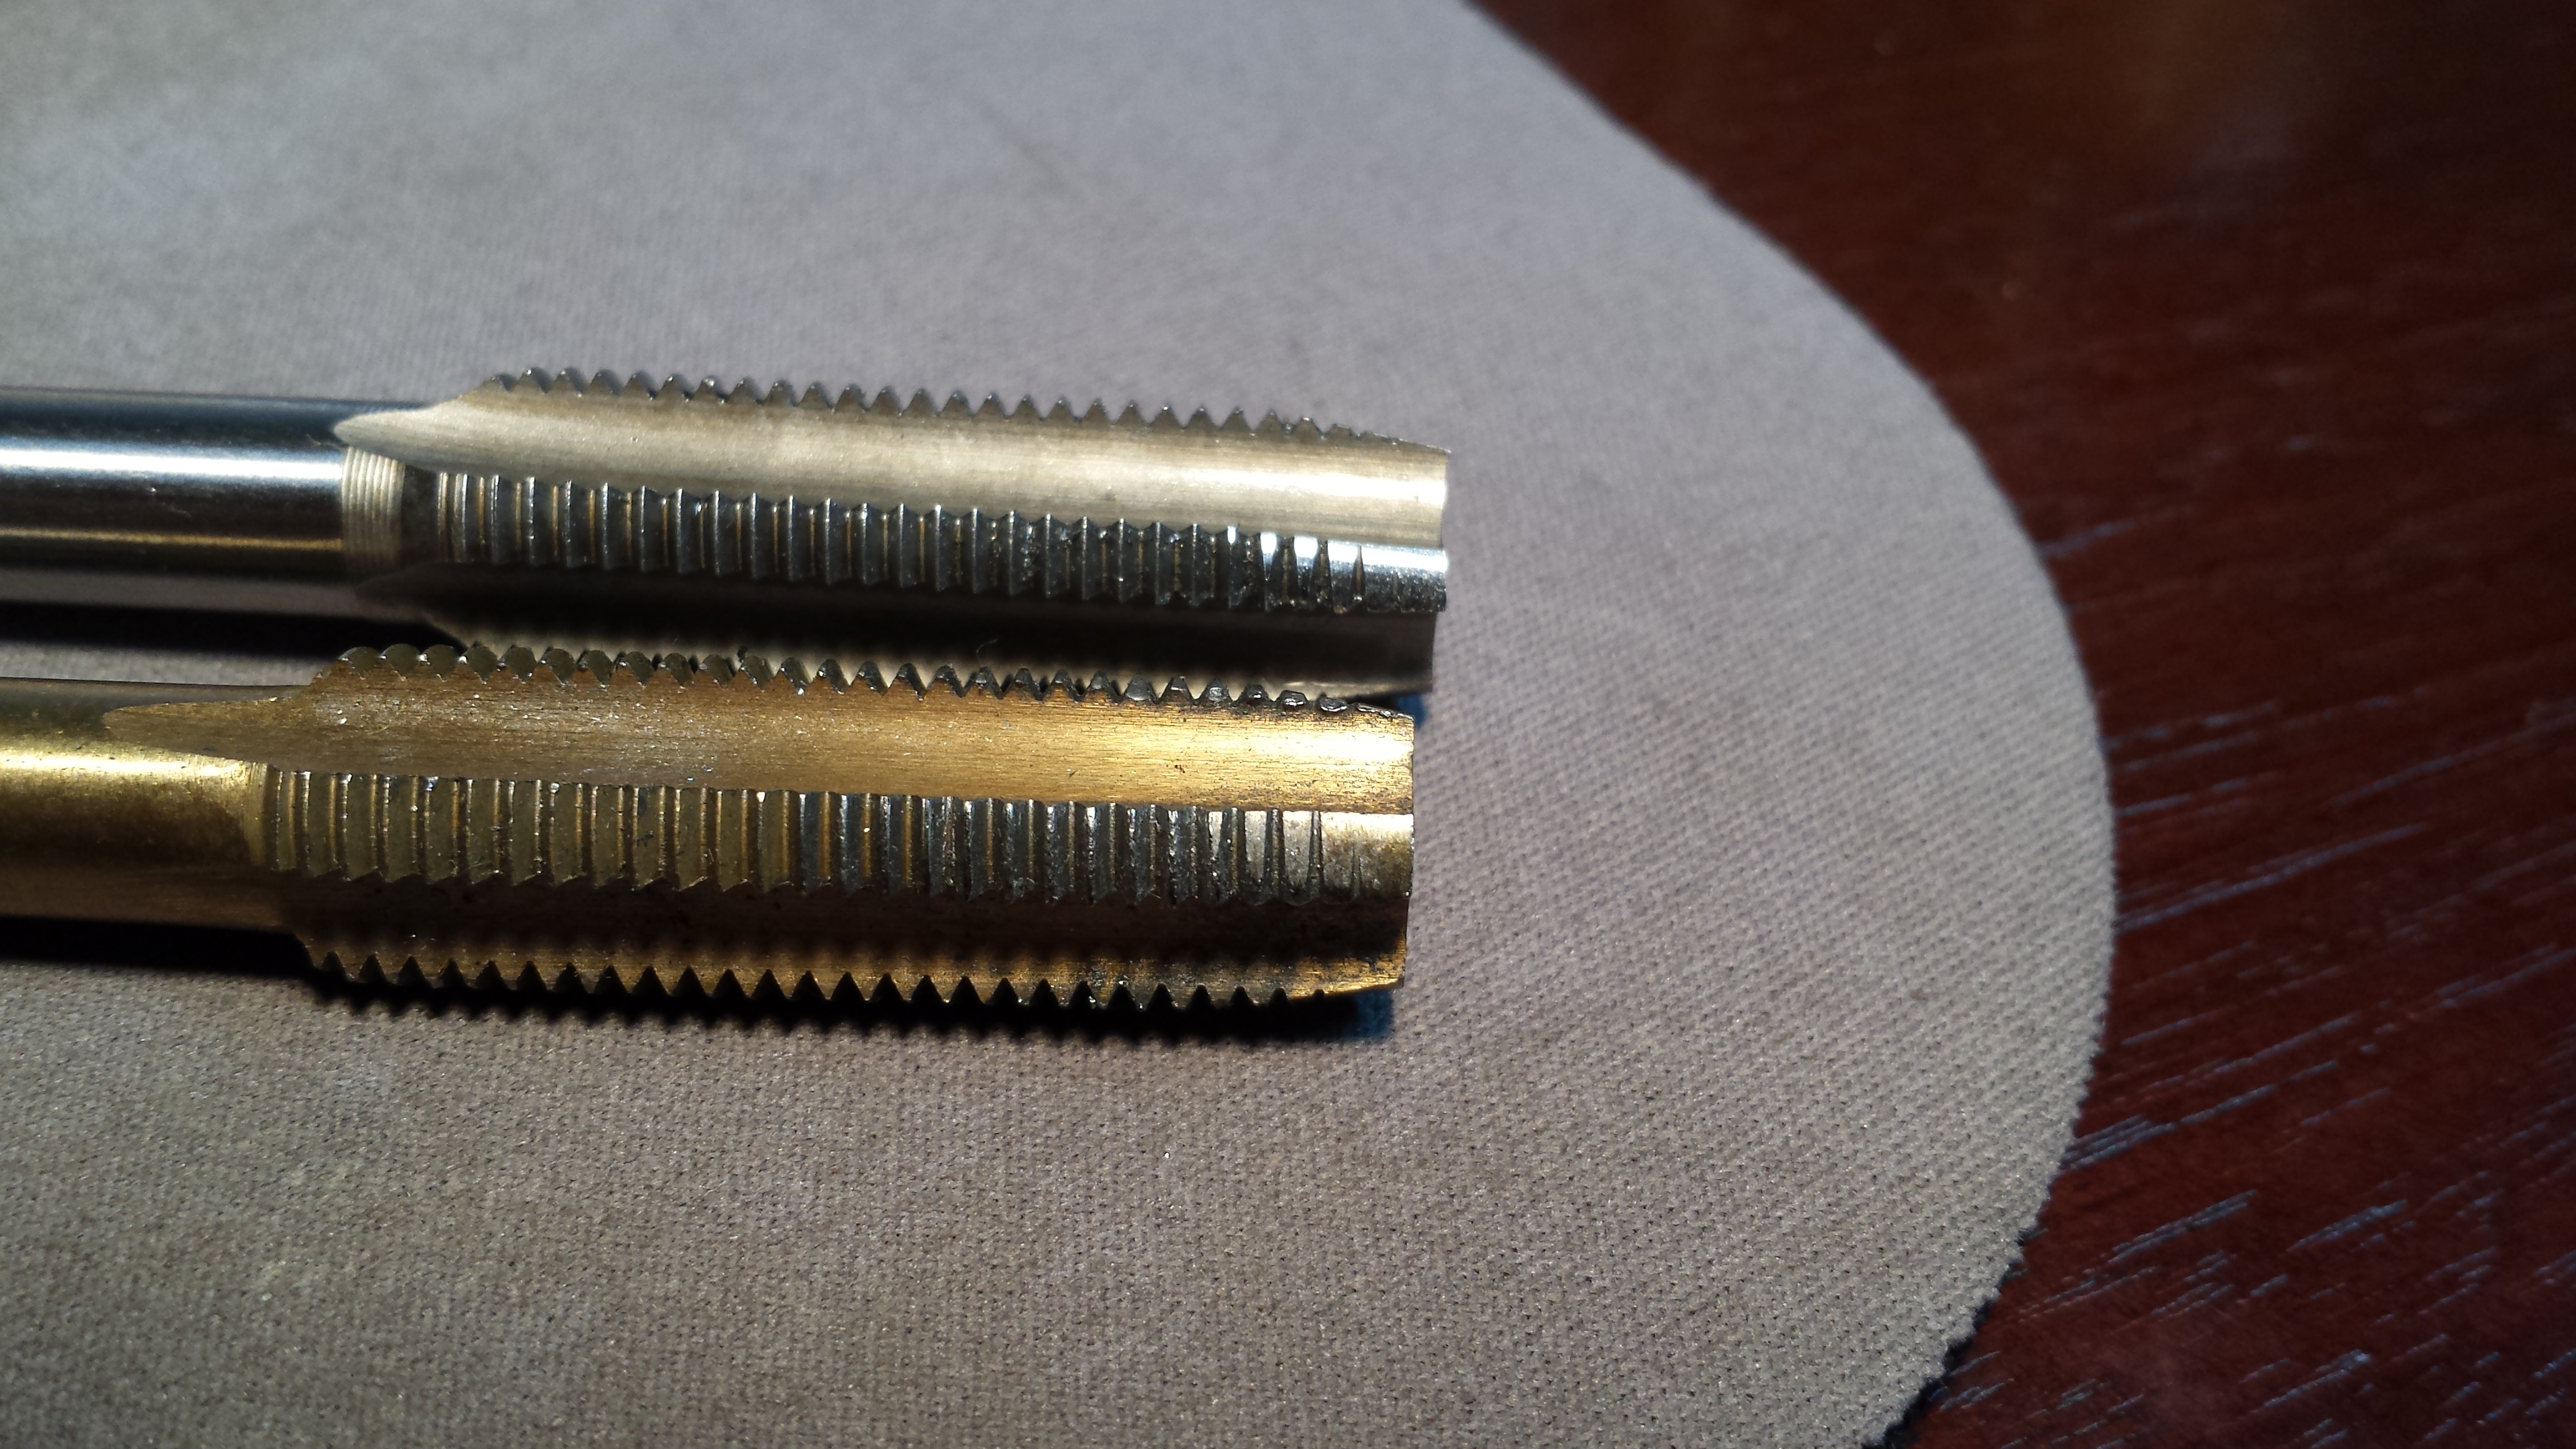
The things I learned from machining the first fixture was to drill and tap the holes FIRST. I made the mistake of precisely machining the bosses in increments of one tenth (0.0001″) until they snugly fit the drilled holes in the gasblock blanks, then went back and drilled and tapped the holes. Suddenly the gasblock blanks no longer fit. The act of tapping ever so slightly enlarged the bosses enough to create an interference fit. I had to go back and re-machine the bosses making them ever so slightly too small now and introduced a little wiggle. I blamed this on the tap itself being of low quality (Kobalt brand from Lowes). The first hole cut fine and the gasblock blank still fit on that one although even more snug but everyone after that was a real pain to tap. The force required kept increasing until I got to the end and realized that the cutting teeth of the tap were worn away and acting more like a form tap pushing the material outwards instead of shearing it away. I didn’t want to take a chance of that happening again so I drilled and tapped first with a a quality tap (Irwin/Hanson brand from Ace Hardware).
If you look closely you can see chipped and worn teeth on the bottom (Kobalt) tap.
I also learned some lessons in the machining process of the first one that I applied to machining this one. Back when I was using the original spindle motor it did not have enough power to make it though steel without stalling so I had to program insanely light cuts to get it to work. As a result the toolpaths were not ideal and resulted in some unfortunate chatter events that ultimately chipped every endmill I used to make the plate with. While programming the cuts for this plate I made them as standard as you could get without being shy of halting the spindle and this worked out so much better and not a single tool damaged.
The increased chip load of the drilling op definitely helped with chip evacuation due to the chip being thicker and more brittle allowing it to break away easier instead of forming a long spring that spins around the drill like a helicopter. Using the automatic center punch as a spring loaded tap guide worked perfectly too.
Another change is that I decreased the height of the boss from 0.2″ to 0.1″ mainly because I didn’t see the utility of it being taller. I suppose it would also help attachment and detachment of the gasblock blanks by requiring less force. In addition to this I put a slight chamfer around the boss edges to also facilitate doffing and donning new gasblock blanks.

Unexpectedly I had the opportunity to experiment with a deep finishing pass using the 0.5″ endmill. By reducing the RPM I was able to eliminate the incessant chattering I have with this endmill. This is encouraging and will prompt me to experiment with full depth or at least half depth finish passes the next time I machine a gasblock.
I’m very happy with the way this fixture turned out and is is a major hurdle out of the way. Onward and upward. I’ll be out of town this coming week so no progress but I will make it up to you by offering a 20% off the Luxor Ti Die pairs sale for Memorial Day except it will last from Friday the 23rd until Tuesday the 27th. Take advantage of this sale by getting an expensive but exquisite product for significantly less!
