
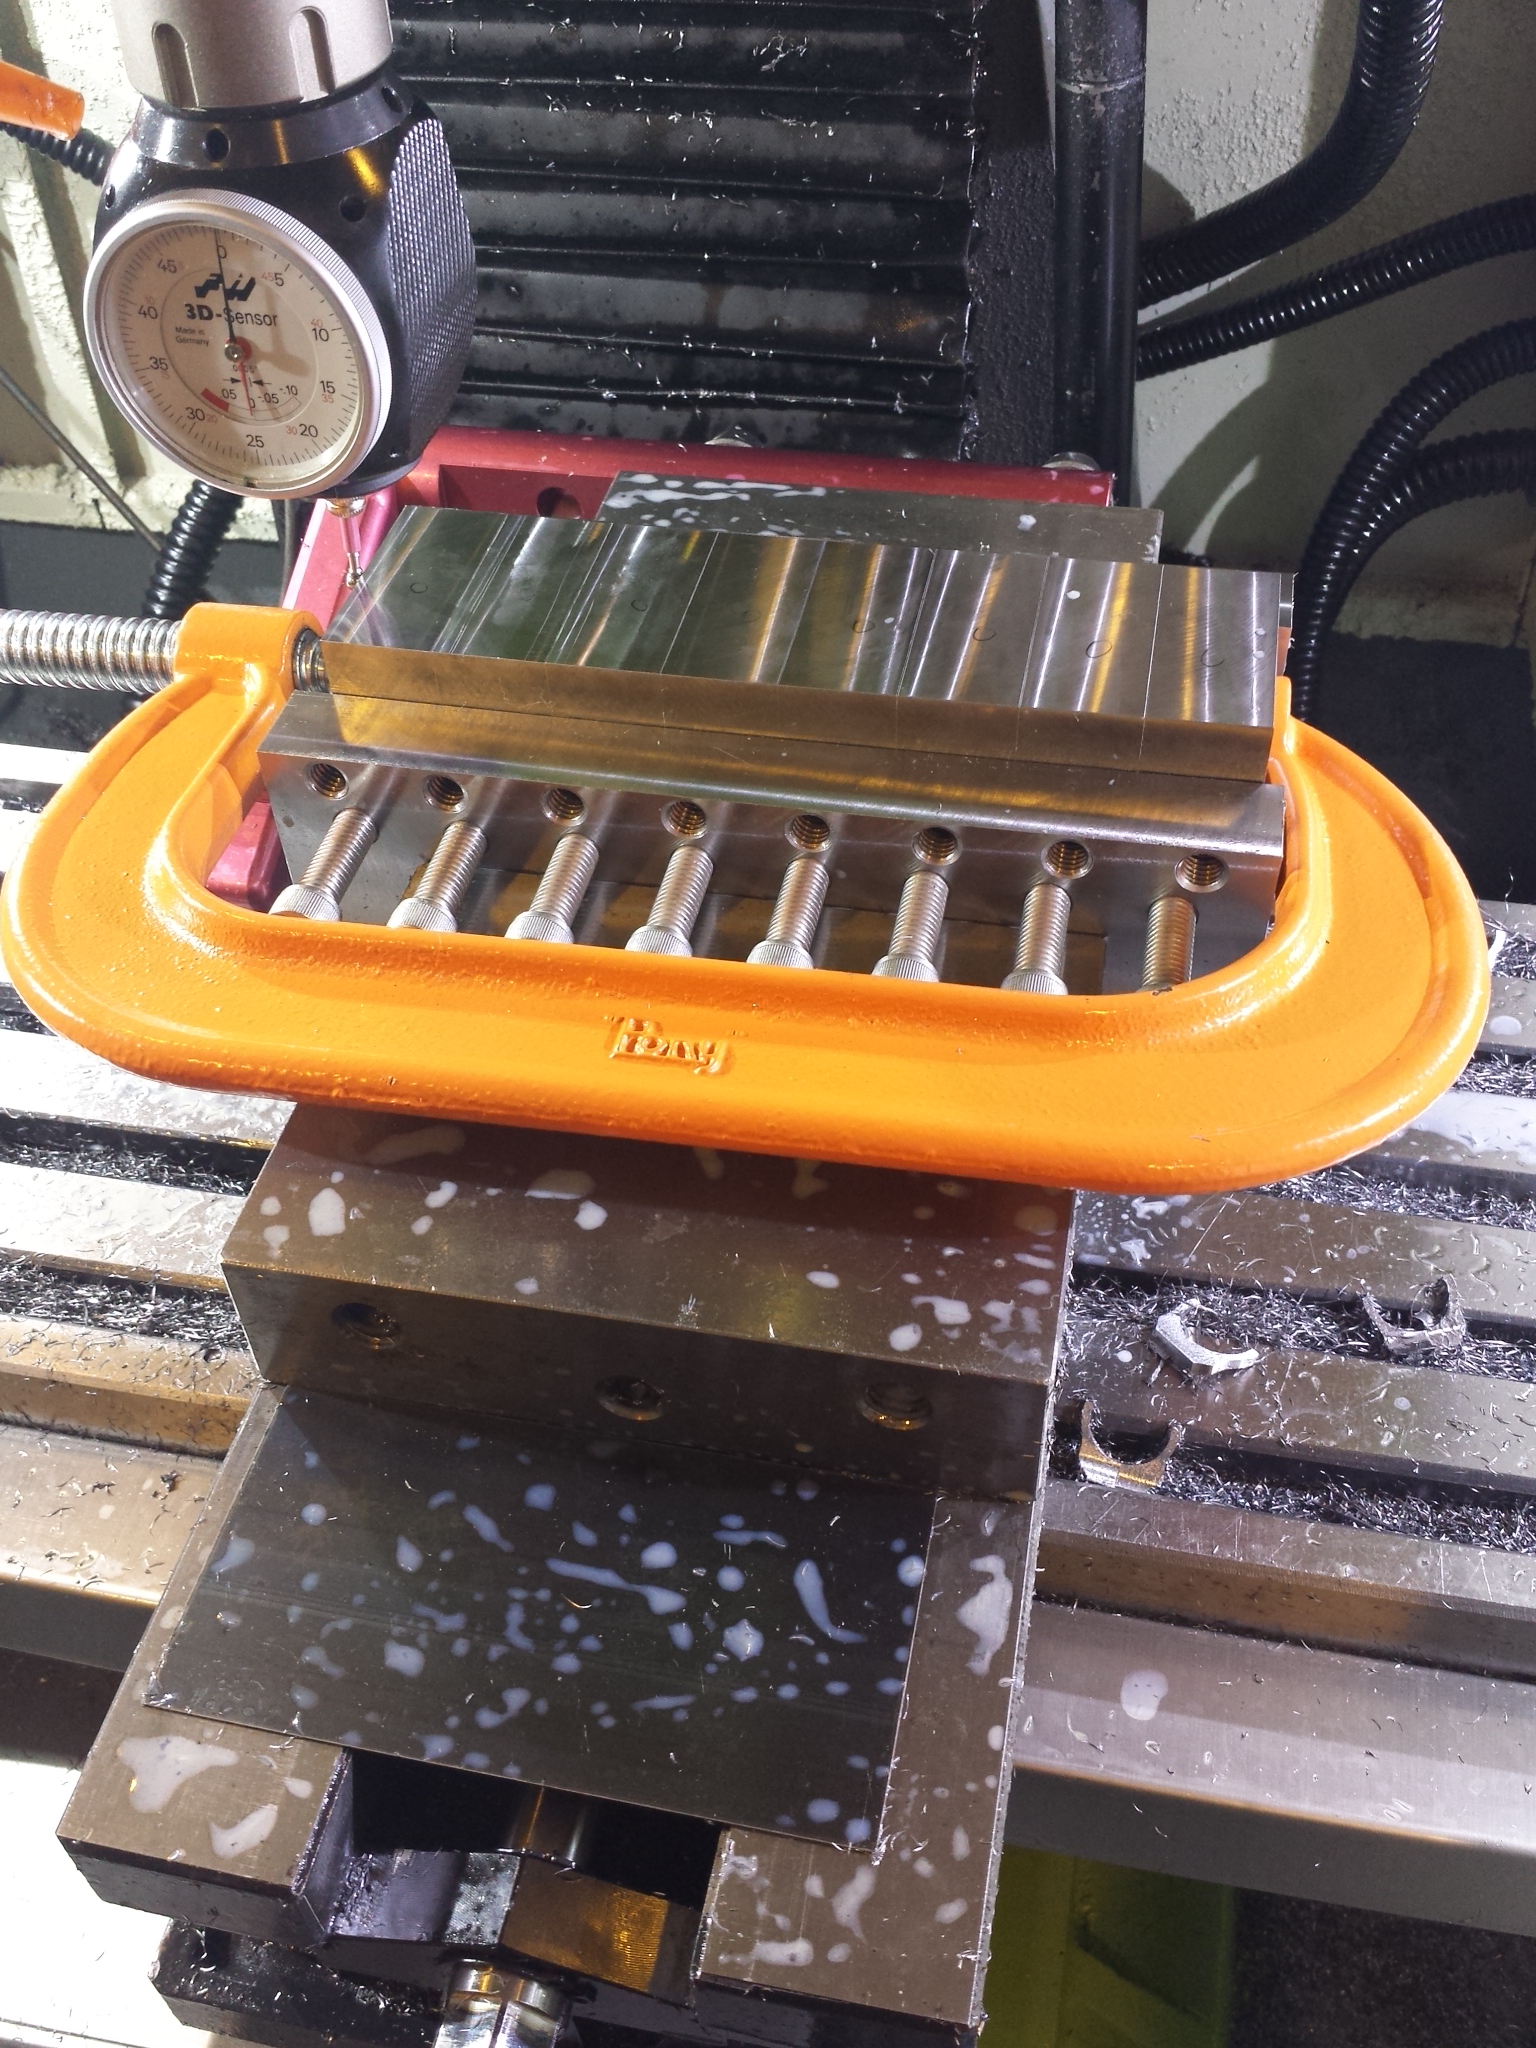
WarBlock Receiver Height AR15 Gas Block CNC Machining (17): soft jaws II squaring stock and barrel pinning
Here we are with the second installment of the soft jaw series within a series. In this episode we explore the other two primary functions that the soft jaws were engineered to serve. The first being the final machining off of the back tab. We start with a problem encountered when using the traditional vise jaws, actually a two-fold dilemma. The first being that the standard jaws only had a length of 6″ so the maximum number of blocks I could hold at once was 6. However all of the other operations have a throughput count of 8, leaving us with a bottleneck to production. The new soft jaws are 8.5″ in length so that we can now hold 8 blocks. The second dilemma was that minor variations in the tolerances of the blocks could leave some that are unclamped and uncaptivated by the tightening of the vise jaws in a conventional manner. Just as with the upper row of bolts in the moveable jaw we have a lower row that are spaced 1″ apart and they will serve a similar function here. The blocks are machined to be 1″ thick and when stacked together in the vise for machining operations they can individually be clamped by virtue of 8 bolts eliminating any possibility for a loose block or one that is not secured against the fixed vice jaw. The lower row of bolts are also centered on the vertical height of the blocks so that when tightened they apply a balanced load acting against the block forcing it tight into the fixed jaw and ensuring a square cut.
In practice this worked well and some unexpected benefits were revealed by this design. The first of which was discovered when facing the 12″ long bars of saw cut steel square and to size. In the past I had been using a long aircraft drill bit to act as the round stock used when squaring stock, and while this worked it was always tedious trying to wedge the shaft in between the moveable jaw and the bar of steel without the bar falling while simultaneously trying to tighten the vise. A much better method I found was to place a length of non-springing stainless steel wire to take the place of the drill. The advantage posed by the soft jaws is that the wire can be wrapped around the the far bolt on one side, ran tightly across the face of the jaw roughly centered on the thickness of the bar, and then wrapped around the last bolt on the opposite side. This created a round stock that would stay put between re-orienting and changing the bar and ending up being a surprisingly significant time saver. The stainless steel wire was also hard enough to resist flattening even with significant vise pressure.
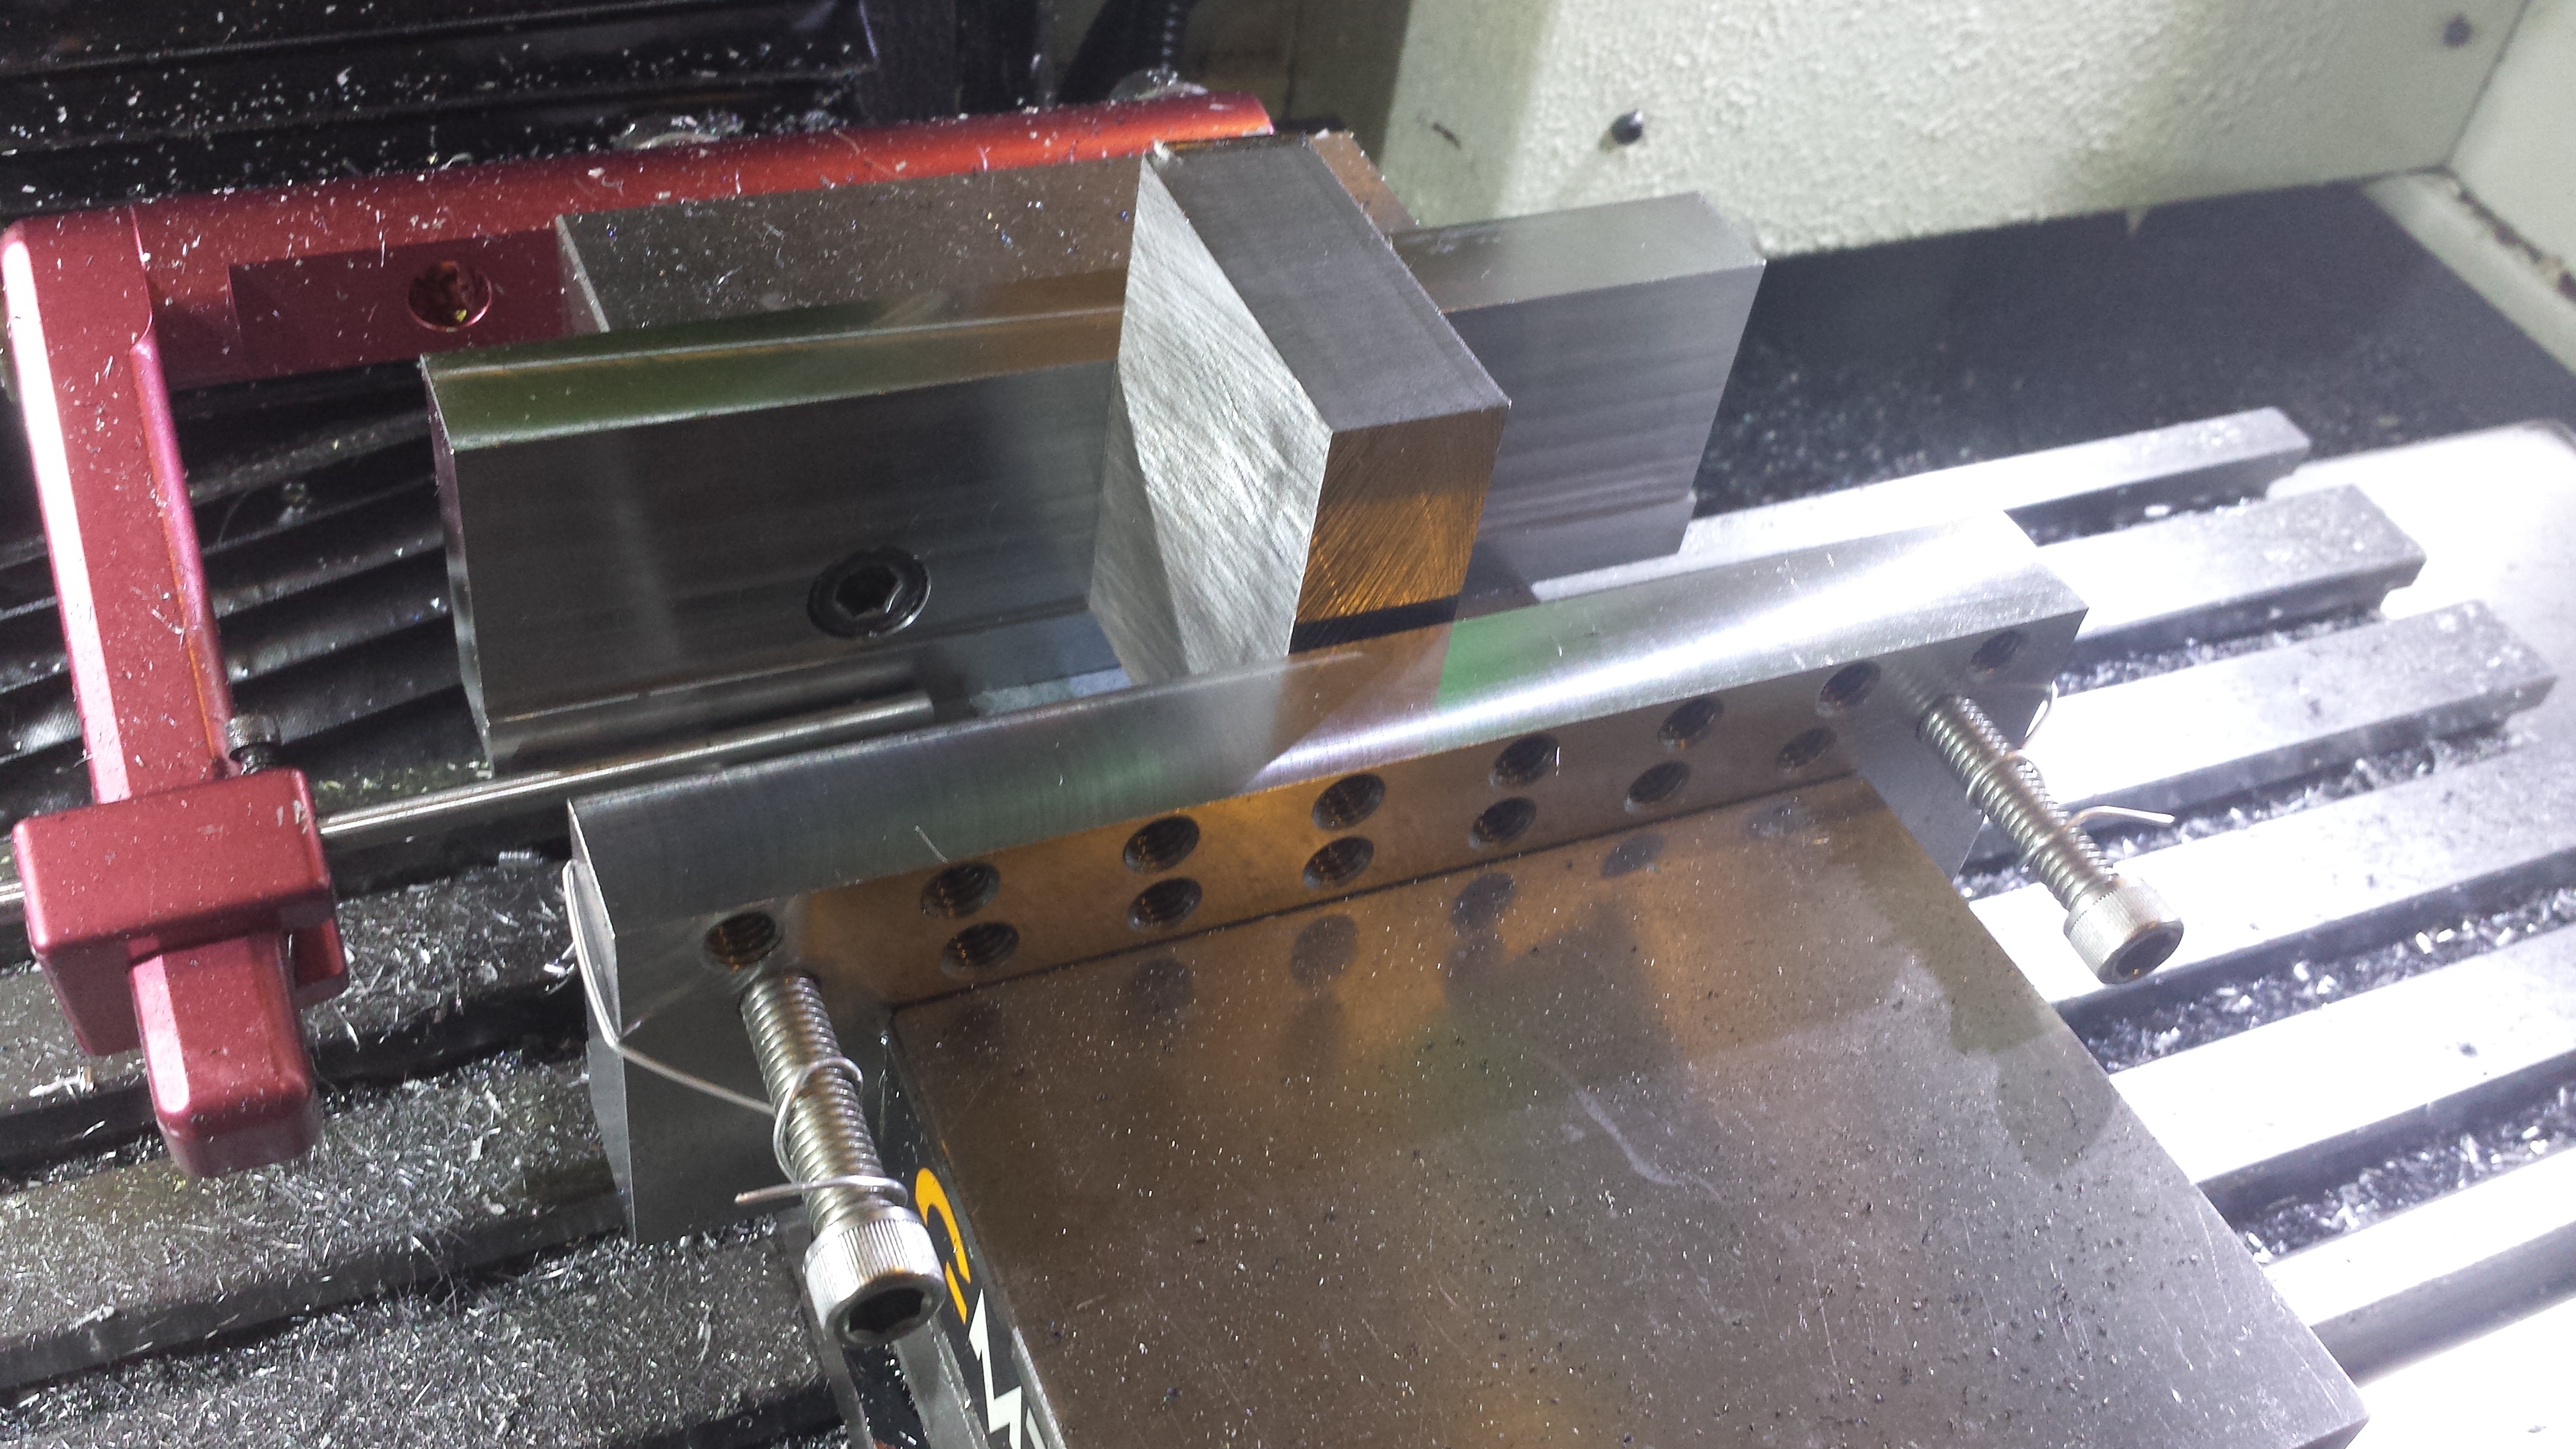
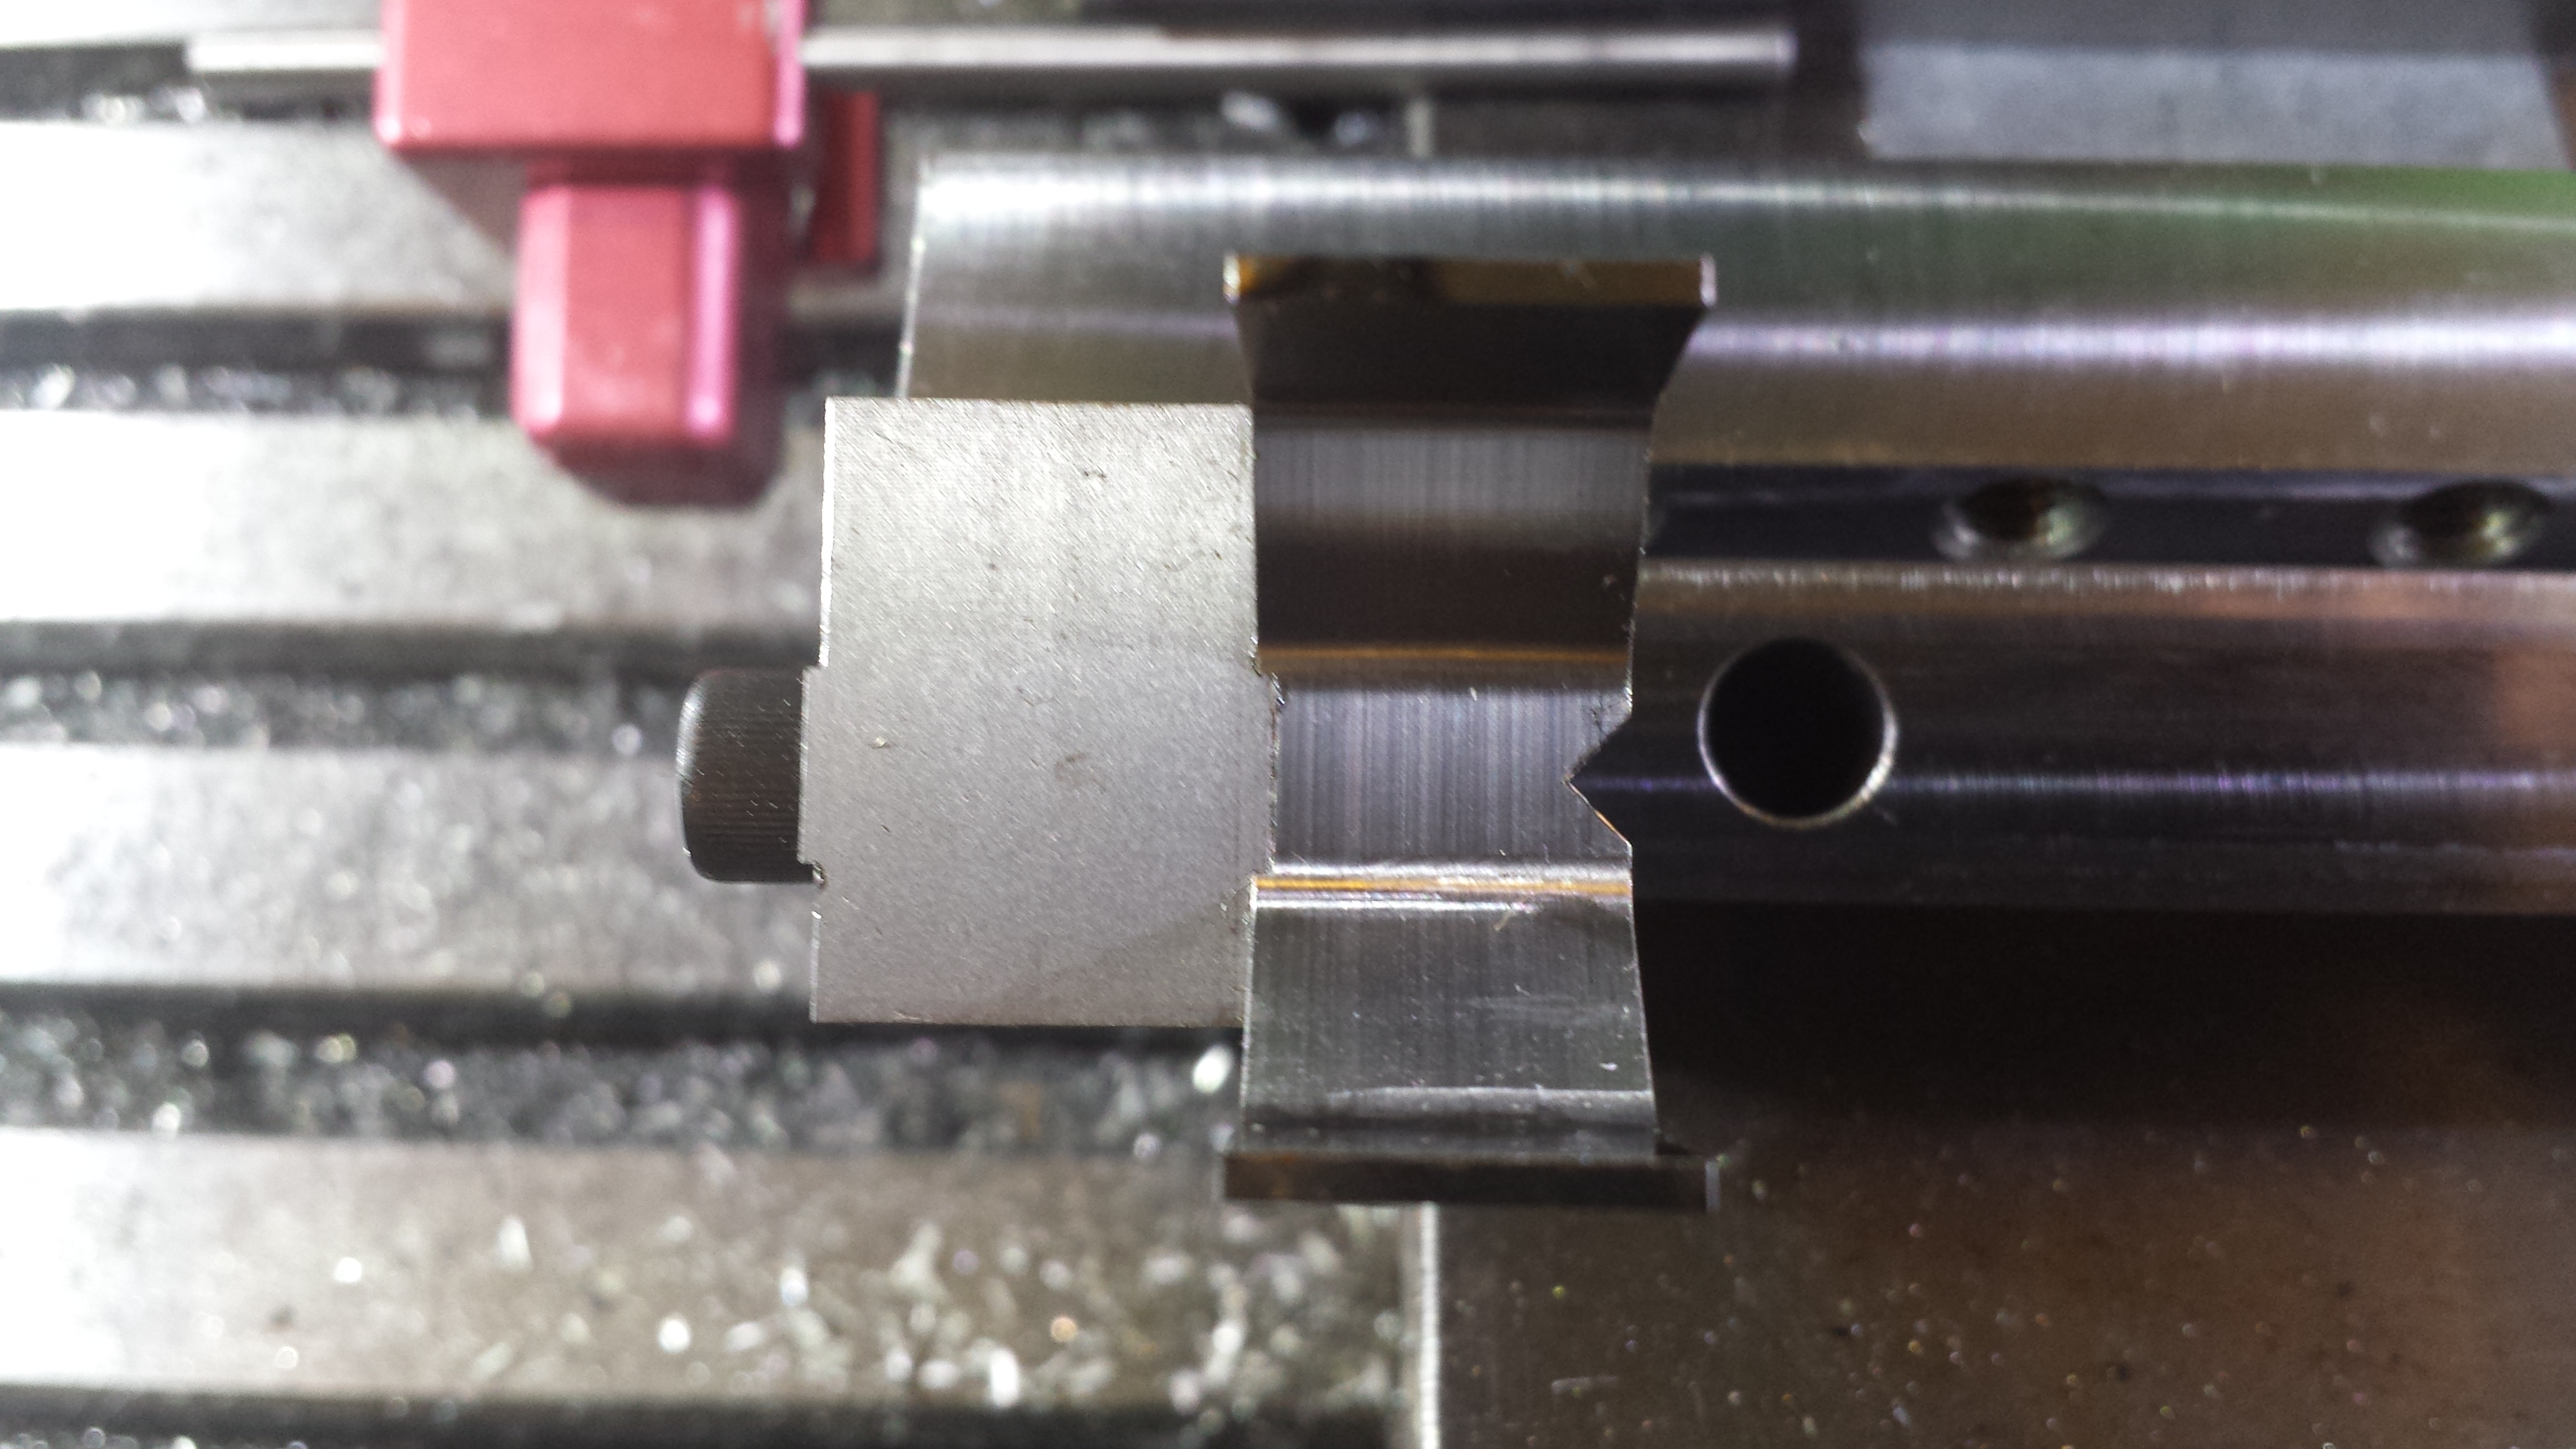
The second benefit discovered was pertaining to squaring the saw cut sides after the 12″ bar was sawed into 5 individual 2.25″ blocks after facing operations. The problem is that the saw cannot cut nearly square enough compared to the mill and the saw cut side is what needs to be indexed to square it to the rest of the already machined sides. It would be very difficult to align 8 blocks at one time to be square to some reference point other than the vise jaws. However with the bolts that can be individually tightened we now have an easy solution. The first step is to open the jaws just enough for blocks to be easily placed between them, then one block is placed on the far left side. A 1-2-3 block is placed beside it sitting flat on the parallel and since the saw cut block cannot be trusted to be square to the parallel it is canted in the X direction to butt up tightly to the very square side of the 1-2-3 block which is square to the parallel. While this arraignment is held securely by hand the appropriate bolt is tightened to clamp the block pinning it against the fixed vice jaw and securing its orientation. Then all of the subsequent 7 blocks can be added and clamped together in the X direction with a large C-clamp thus butting all of the machined sides of the blocks against each other and to the same squareness as the first captivated block. The top can them be faced smooth and square. When flipping the stack to machine the other side this process can be omitted as not necessary since the freshly faced side is now presumed square.
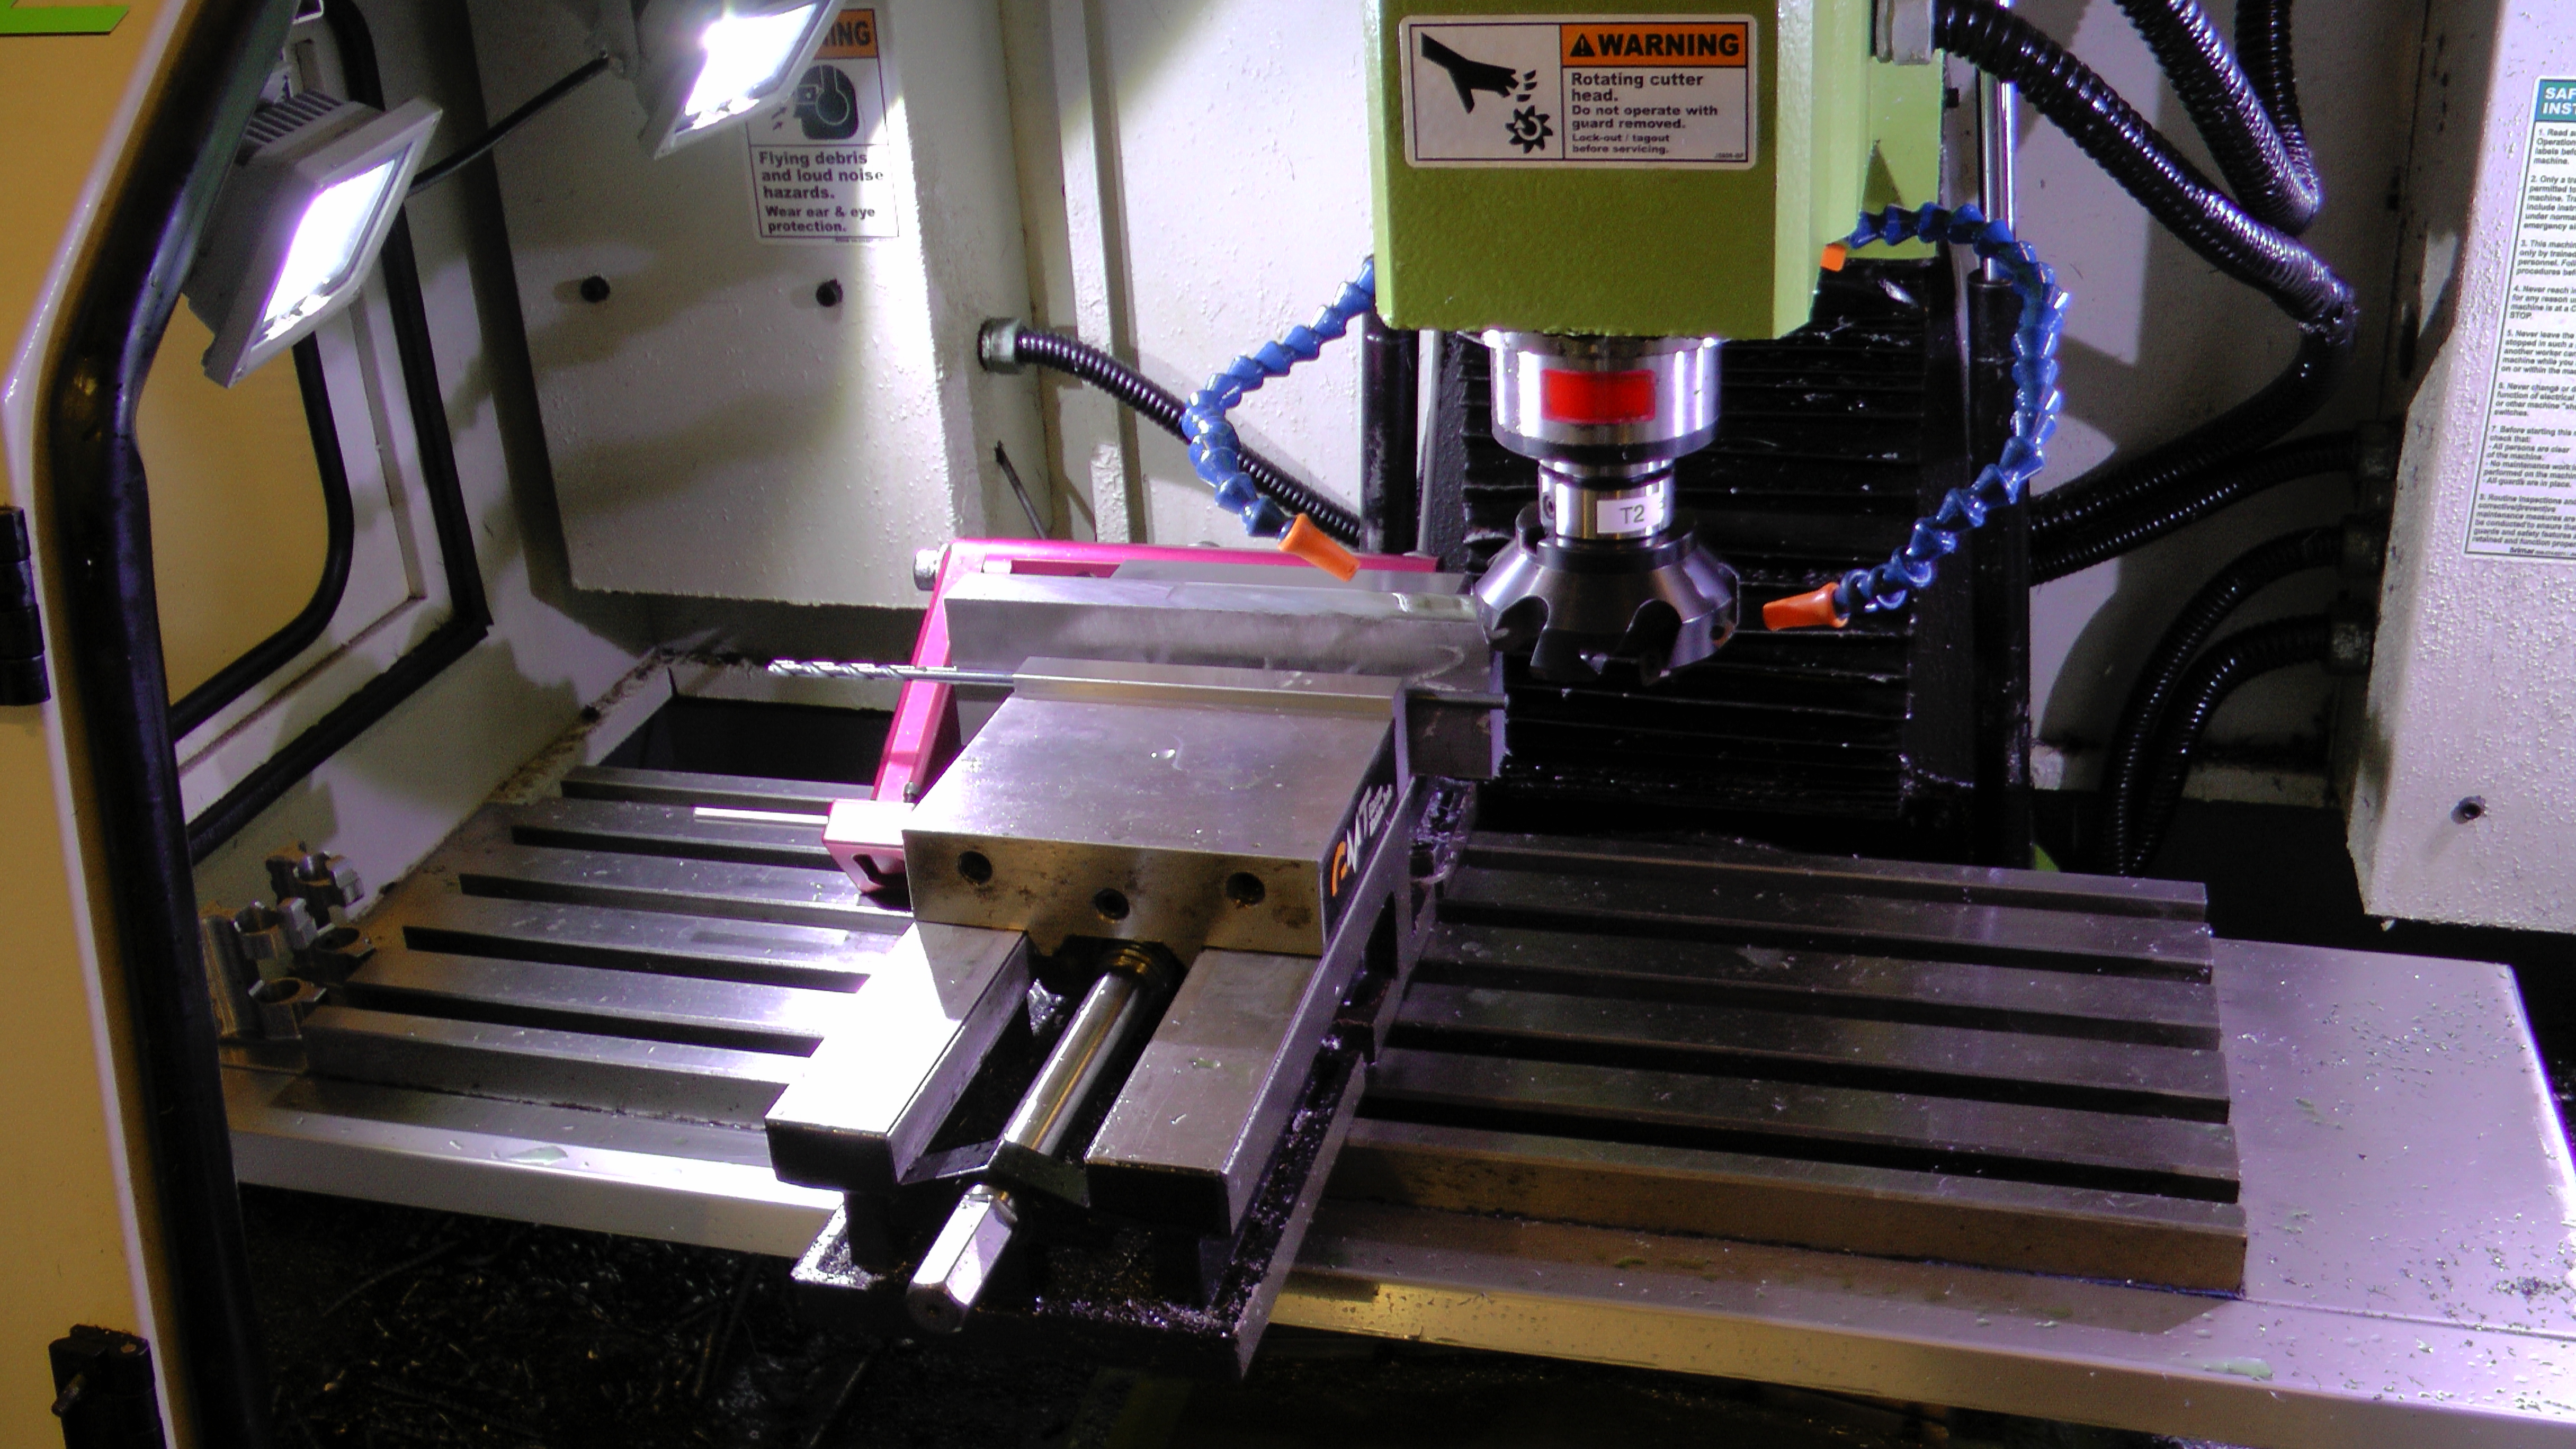
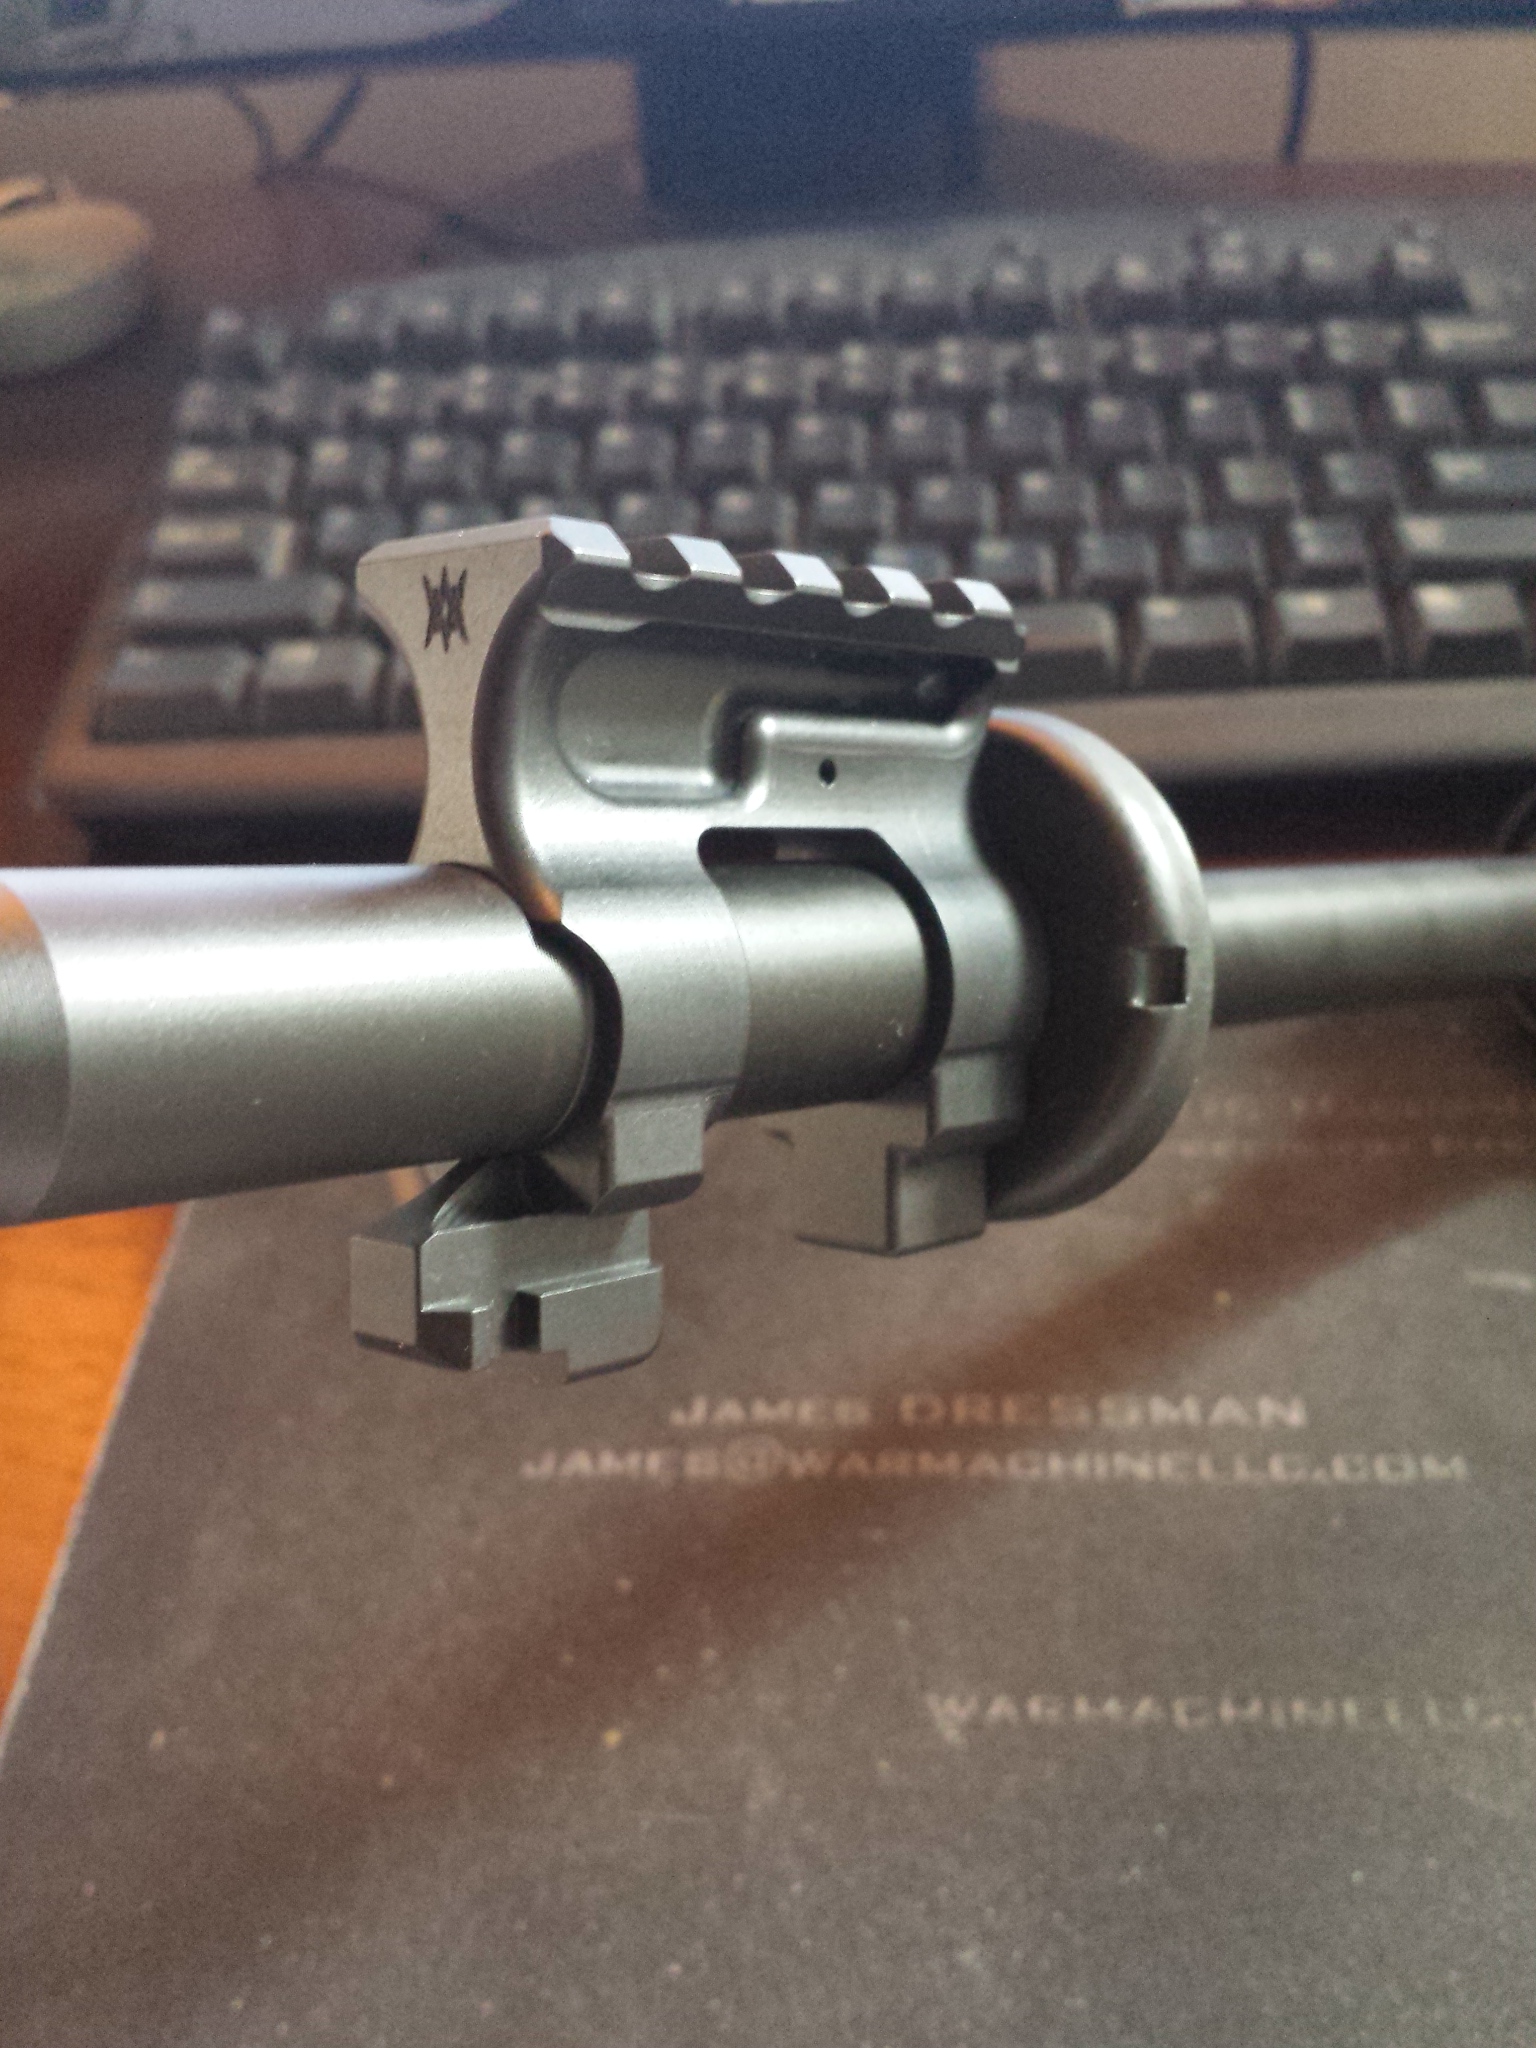
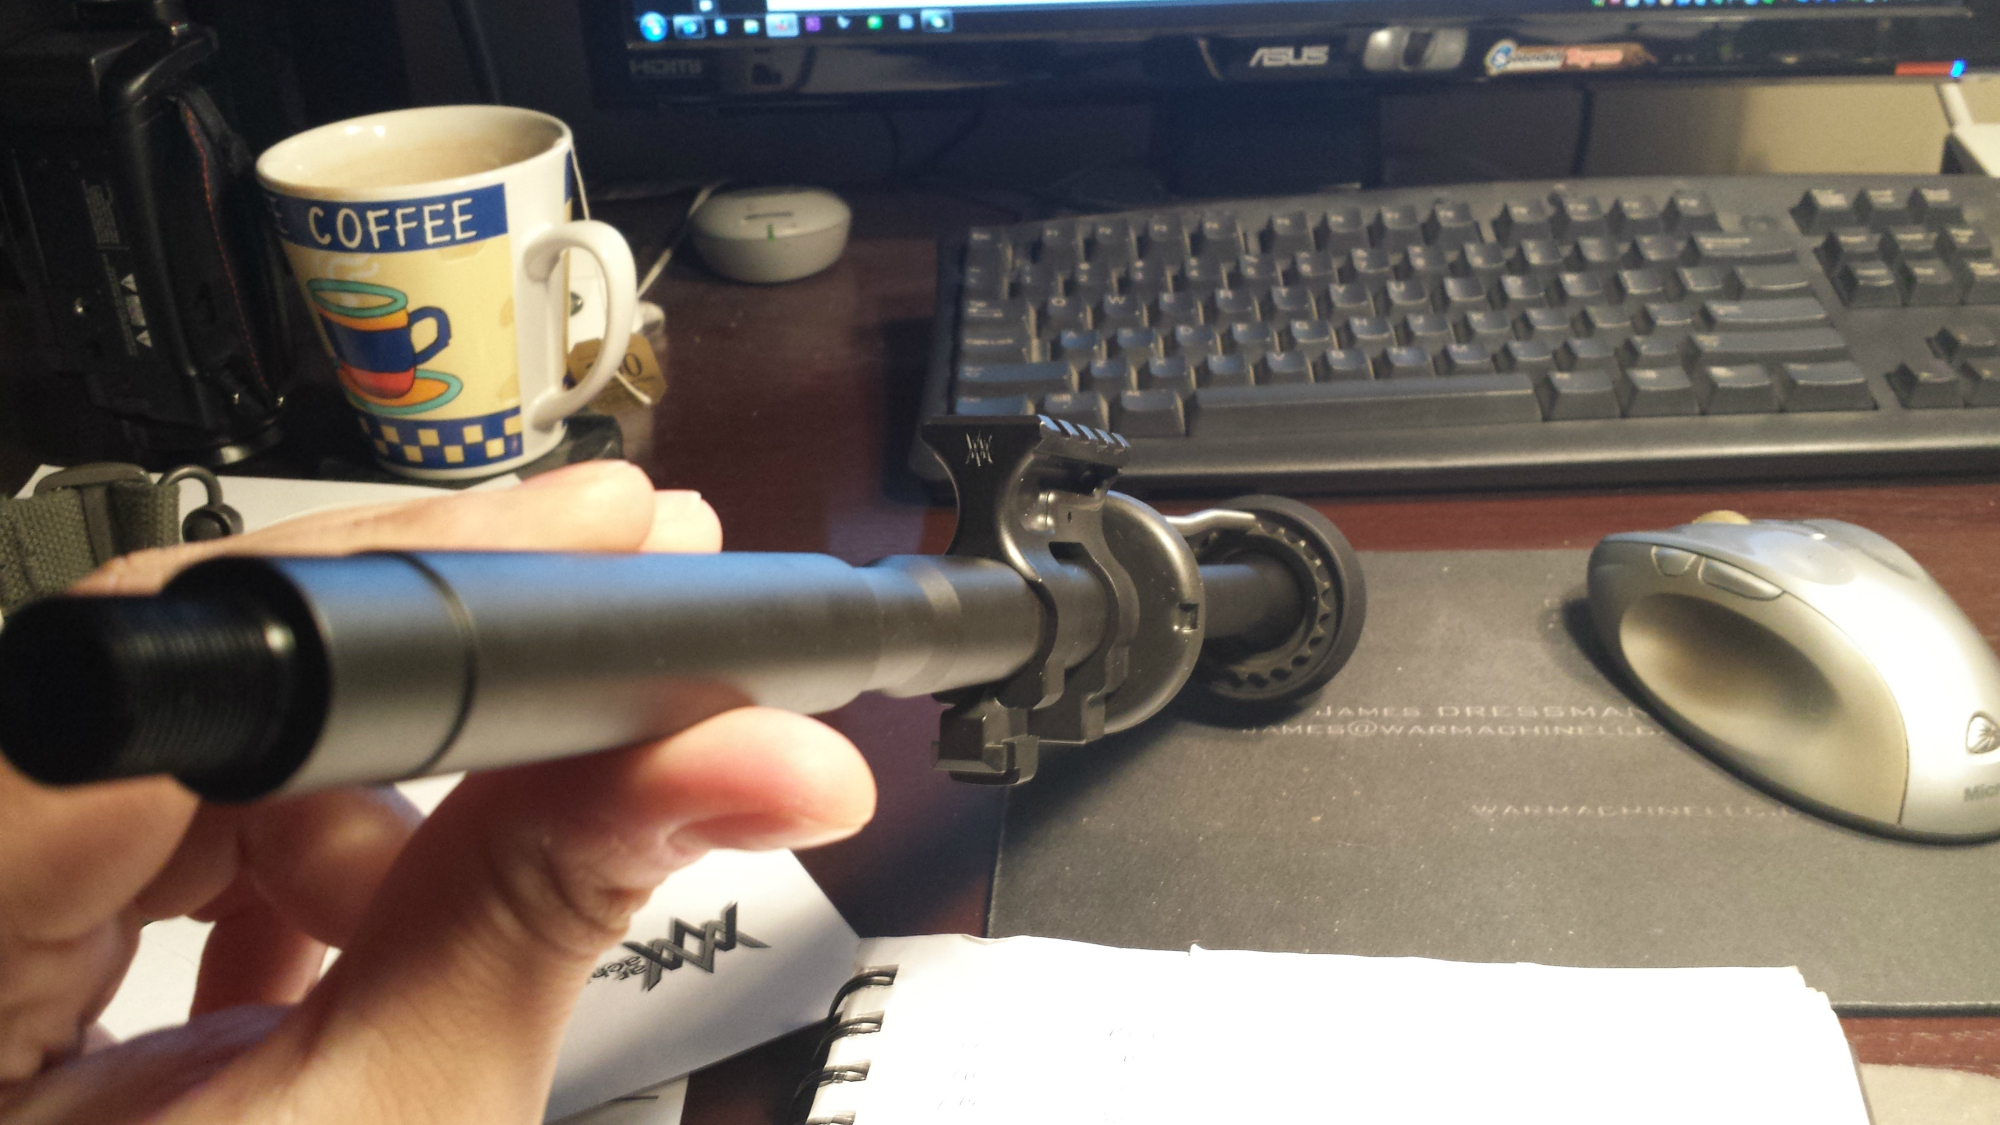
Now for the final designed function of the soft jaws and to many what will be the main event. If you recall in the last video there was a shallow slot and blind threaded holes that were milled into the back of the fixed vise jaw. These features are for another fixture that will be used in conjunction with the fixed jaw itself. When drilling and pinning a gasblock into an AR15 barrel they must adhere to certain criteria with regards to spacing and alignment. First the obvious is that the gasblock must be aligned rotationally such that the gas port outlet of the barrel matches up with the gas port inlet of the gasblock. Although there is a certain amount of fudge factor built into the stringency of this alignment given that the barrel gas port is on the order of 0.063″ in diameter (varies with barrel length and gas system) whereas the gasblock inlet port which must align to it is 0.1405″, a pretty generous misalignment safeguard. However a standard front sight base, gasblock with integrated front sight, or railed gasblock must be much better aligned than this or else it will affect the front and rear sight alignment. In this case with a railed gasblock we have a registration feature in the top flight deck portion of the rail since it is milled perfectly square with the rest of the gasblock as well as the bore. So we must simply devise a way to rotationally index the top rail of the gasblock to the gas port of the barrel but more precisely to the top rail of the receiver. How do we do this without a receiver? An AR15 barrel extension has a 0.125″ dowel pin called an indexing pin drilled and pressed into the the exact 12 o’clock position in relation not only to the bolt lugs and feed ramps, but also the gas port. Then in later assembly this indexing pin aligns the barrel to the receiver buy slipping into a milled slot in the exact 12 o’clock position of the receiver which is also square to the top rail. Armed with this knowledge we can then design a holding and aligning fixture based on these features.
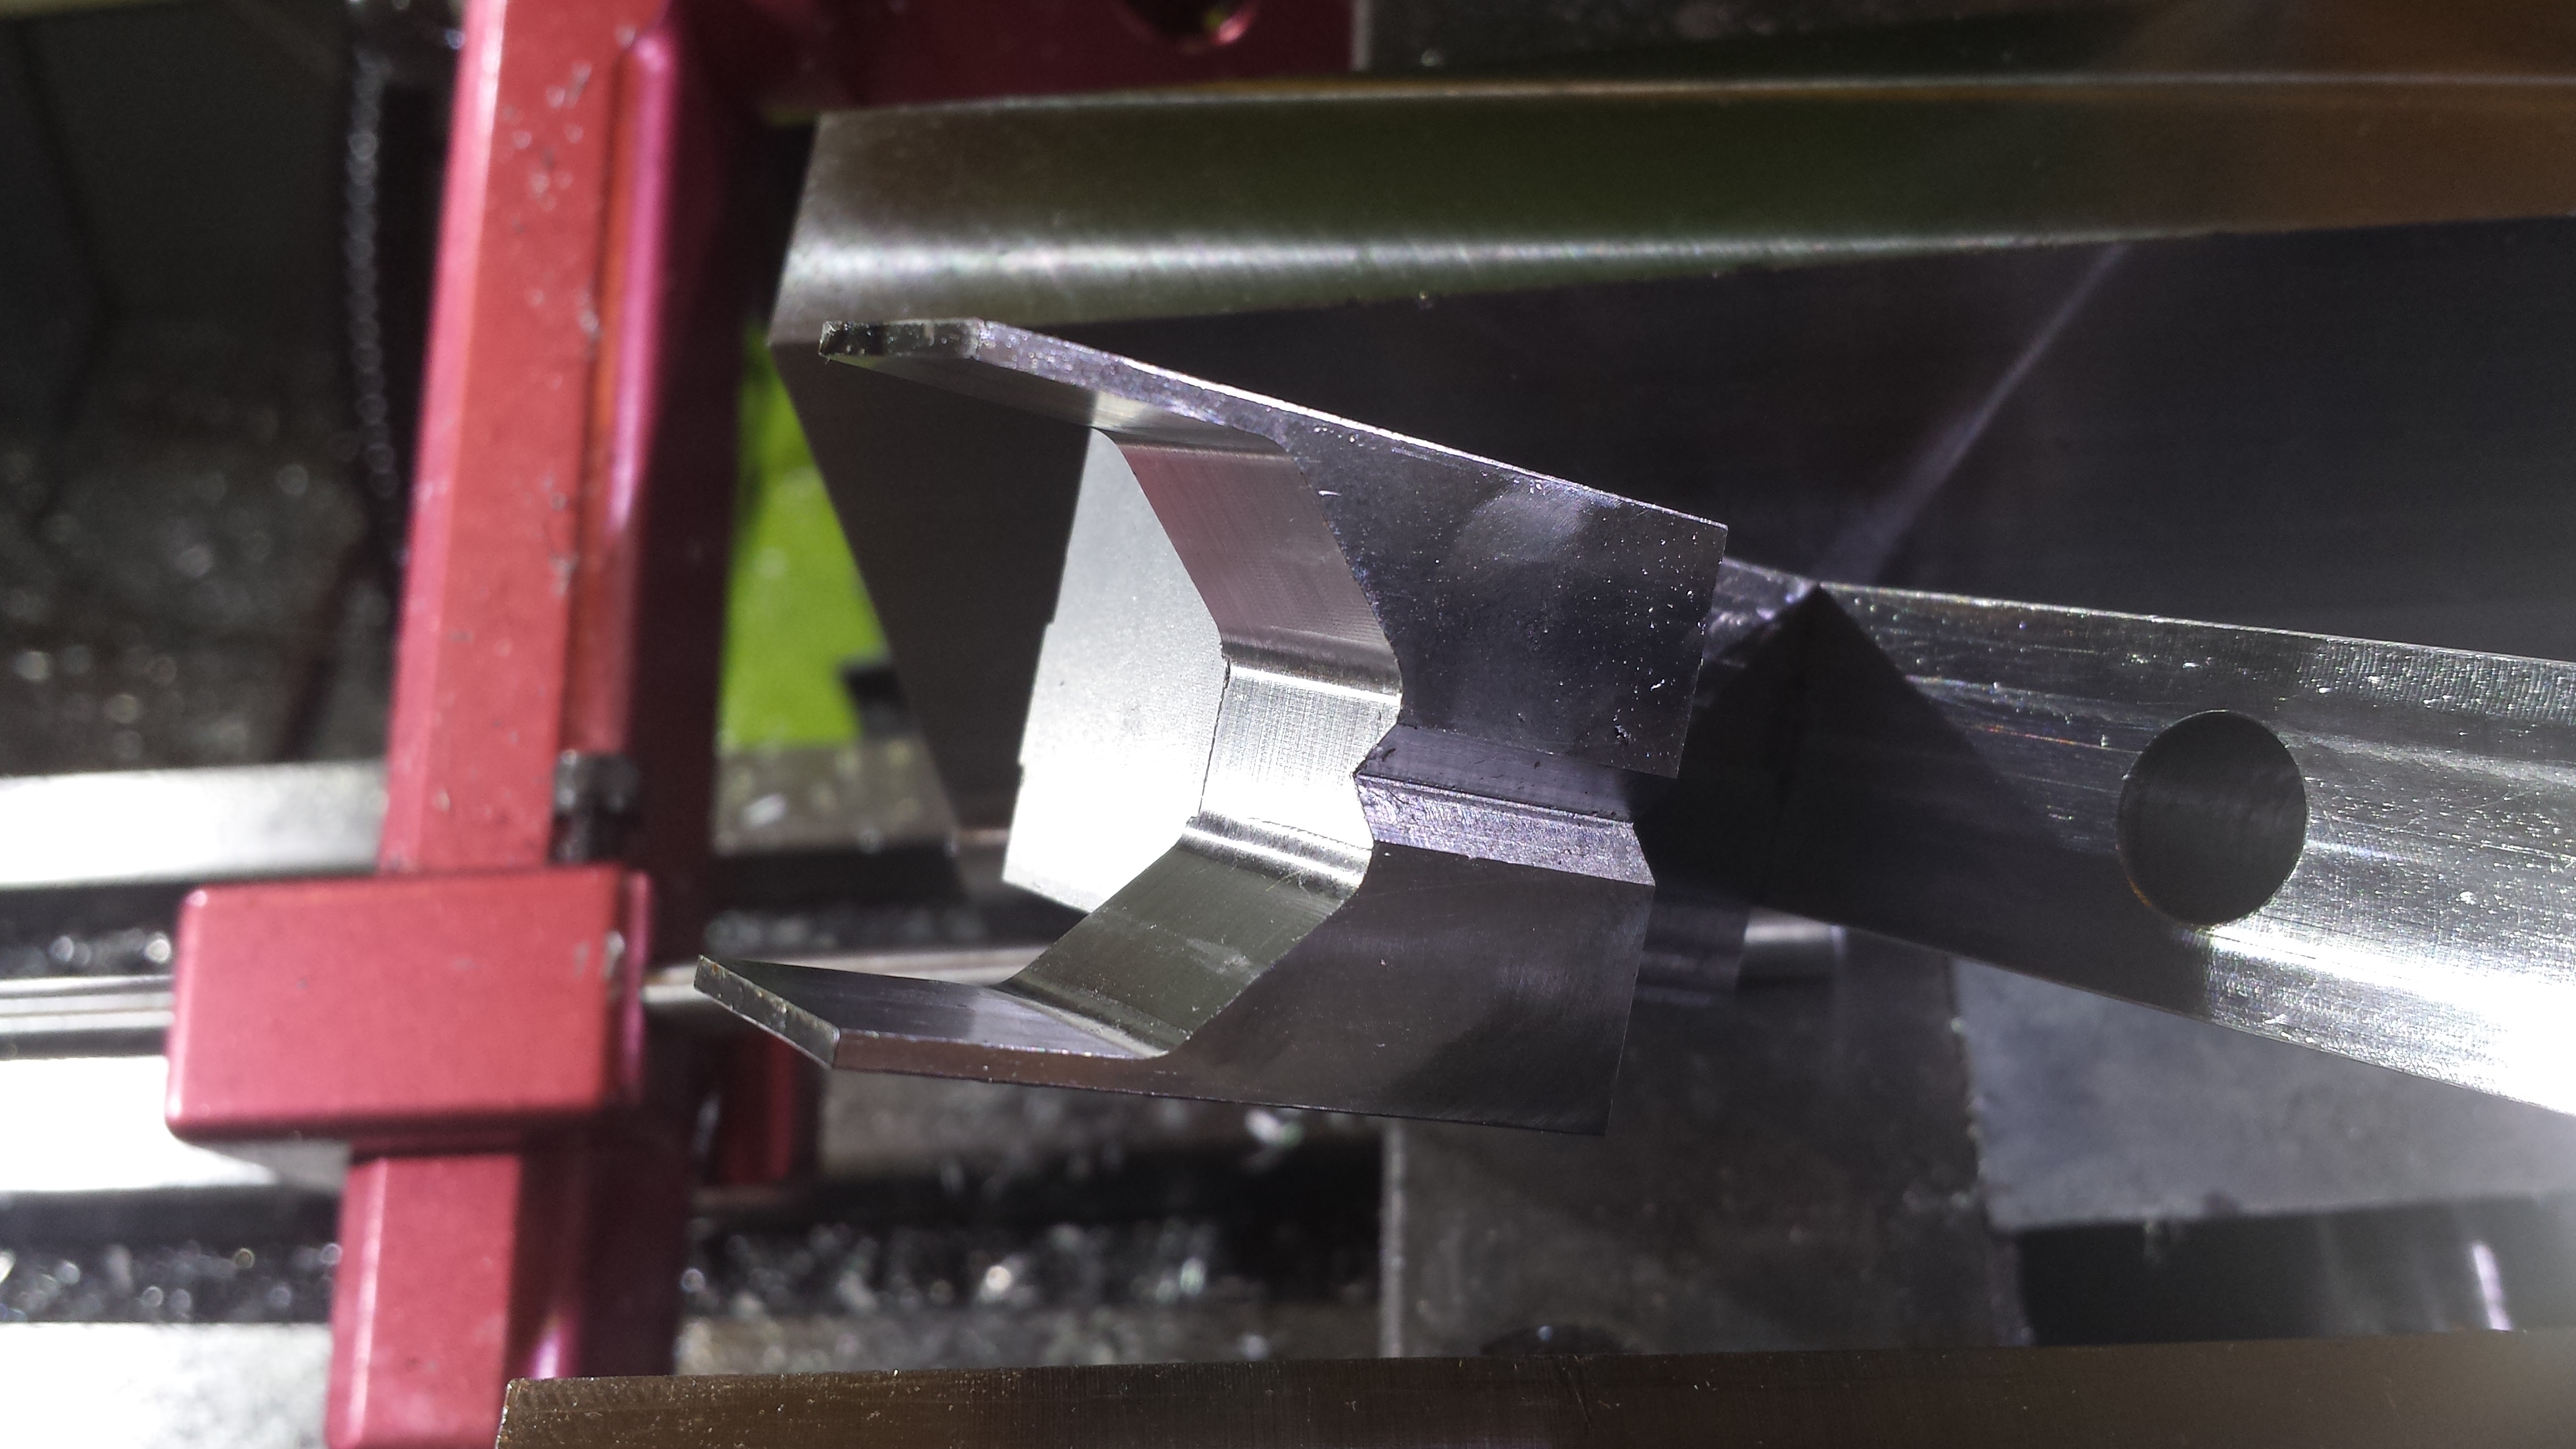
Doing a cursory review of some preexisting barrel pinning fixtures on the market they seem to index the barrel in a similar way to how the barrel in secured to a receiver. There is basically a metal plate with a 1″ hole for the barrel extension and milled slot to accept the indexing pin. Fearing that this method would not be as precise due to any slop or play in either the extension hole or the indexing slot I set out to make something better, something with a more positive dead reckoning. I pondered this and settled on the only method that would always ensure zero play in the alignment no matter what the tolerances of the barrel and that only required 3 points of registration, one being adjustable to fit. The mighty 90 deg. angle also known as the V block. I began thinking of ways to mill a V-block by canting the angles in the vise but that lasted about 5 sec. when it dawned on my that I have a CNC machine I can make any angle I want, we don’t need no stinking sine vises. Then it also dawned on my that since we are dealing with right angles offset 45 degrees I already have a tool to do this, the 45deg. chamfer mill. From here I simply machined the main “V-block” with endmills being careful to fully support the thin “ears” within the vice jaws, then in the same setup machined the other “V-block” with the chamfer mill to essentially make two V-blocks in one.

In making this fixture I made sure to key all the mating pieces so that they can positively align and remain square with only one bolt holding them together. The long bar simply rides in the snug fitting slot in the back of the fixed vise jaw so that it is also keyed square. When thinking about this fixture it only made sense to make it adjustable for different barrel lengths so the long bar can be pulled out to accommodate the different length barrels. I also made it reversible for no reason other than it was easy to do at the time and would really help in the off chance I needed to secure a barrel from the other side.
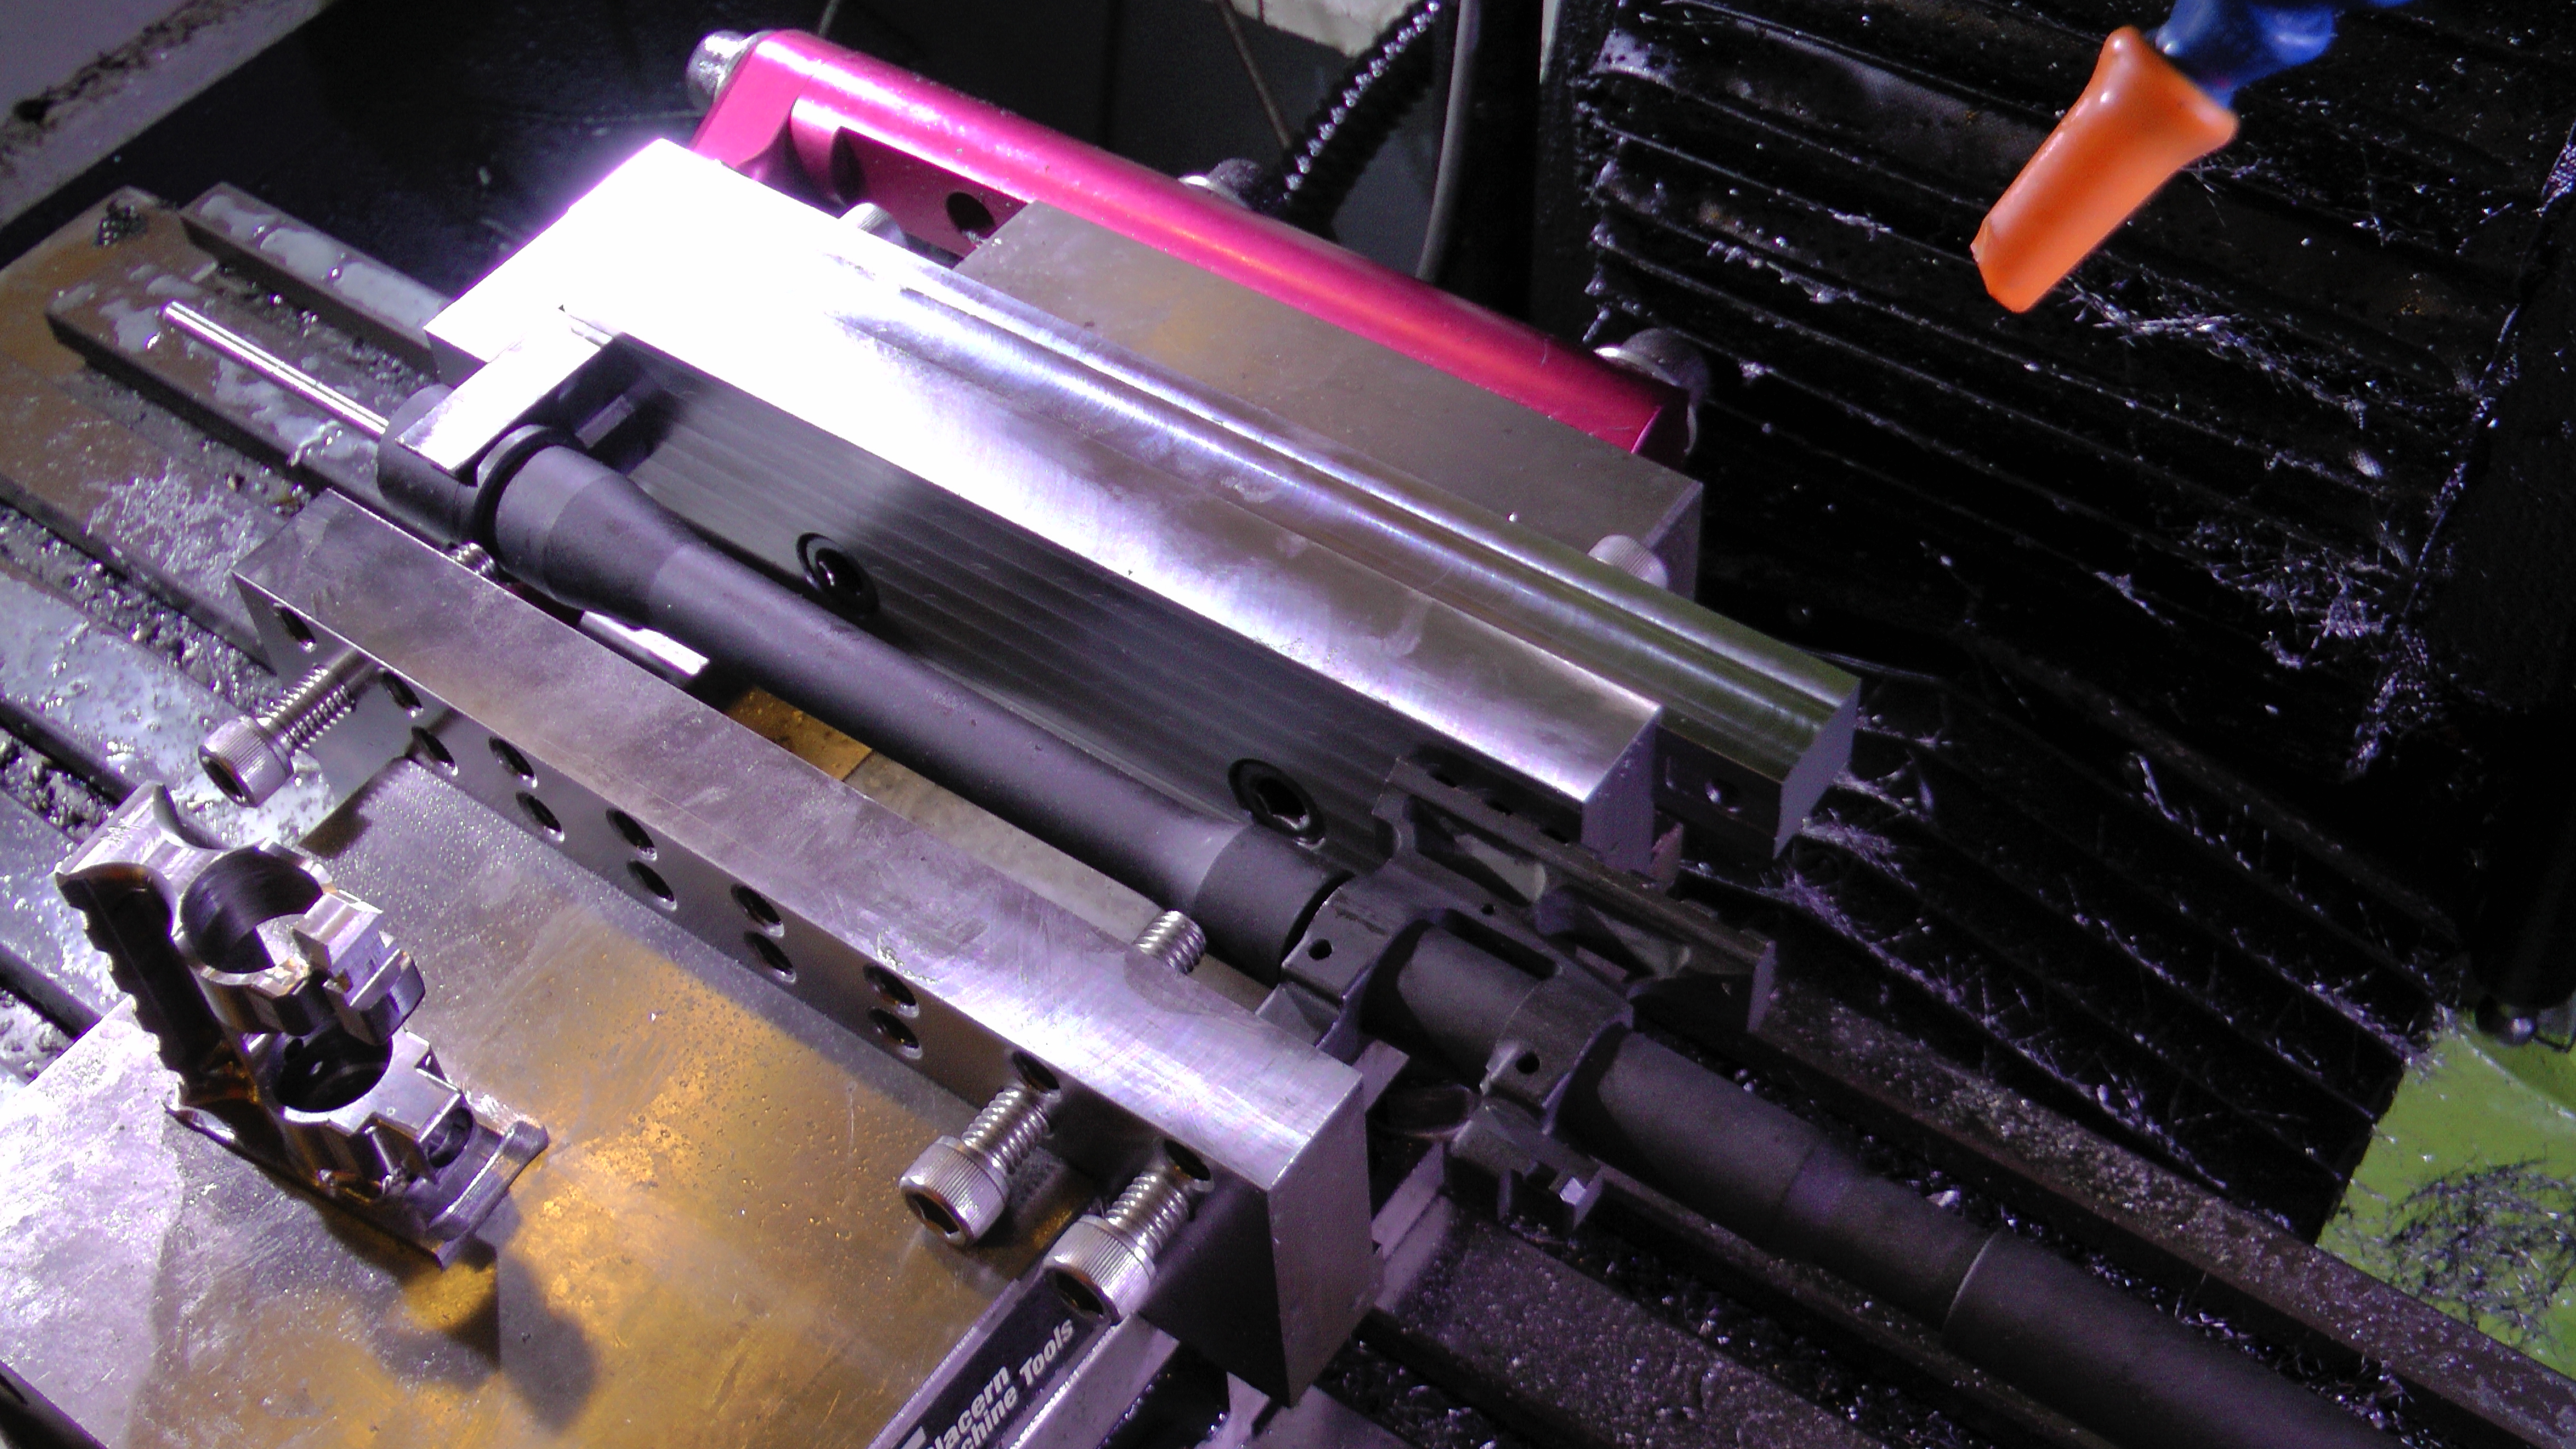
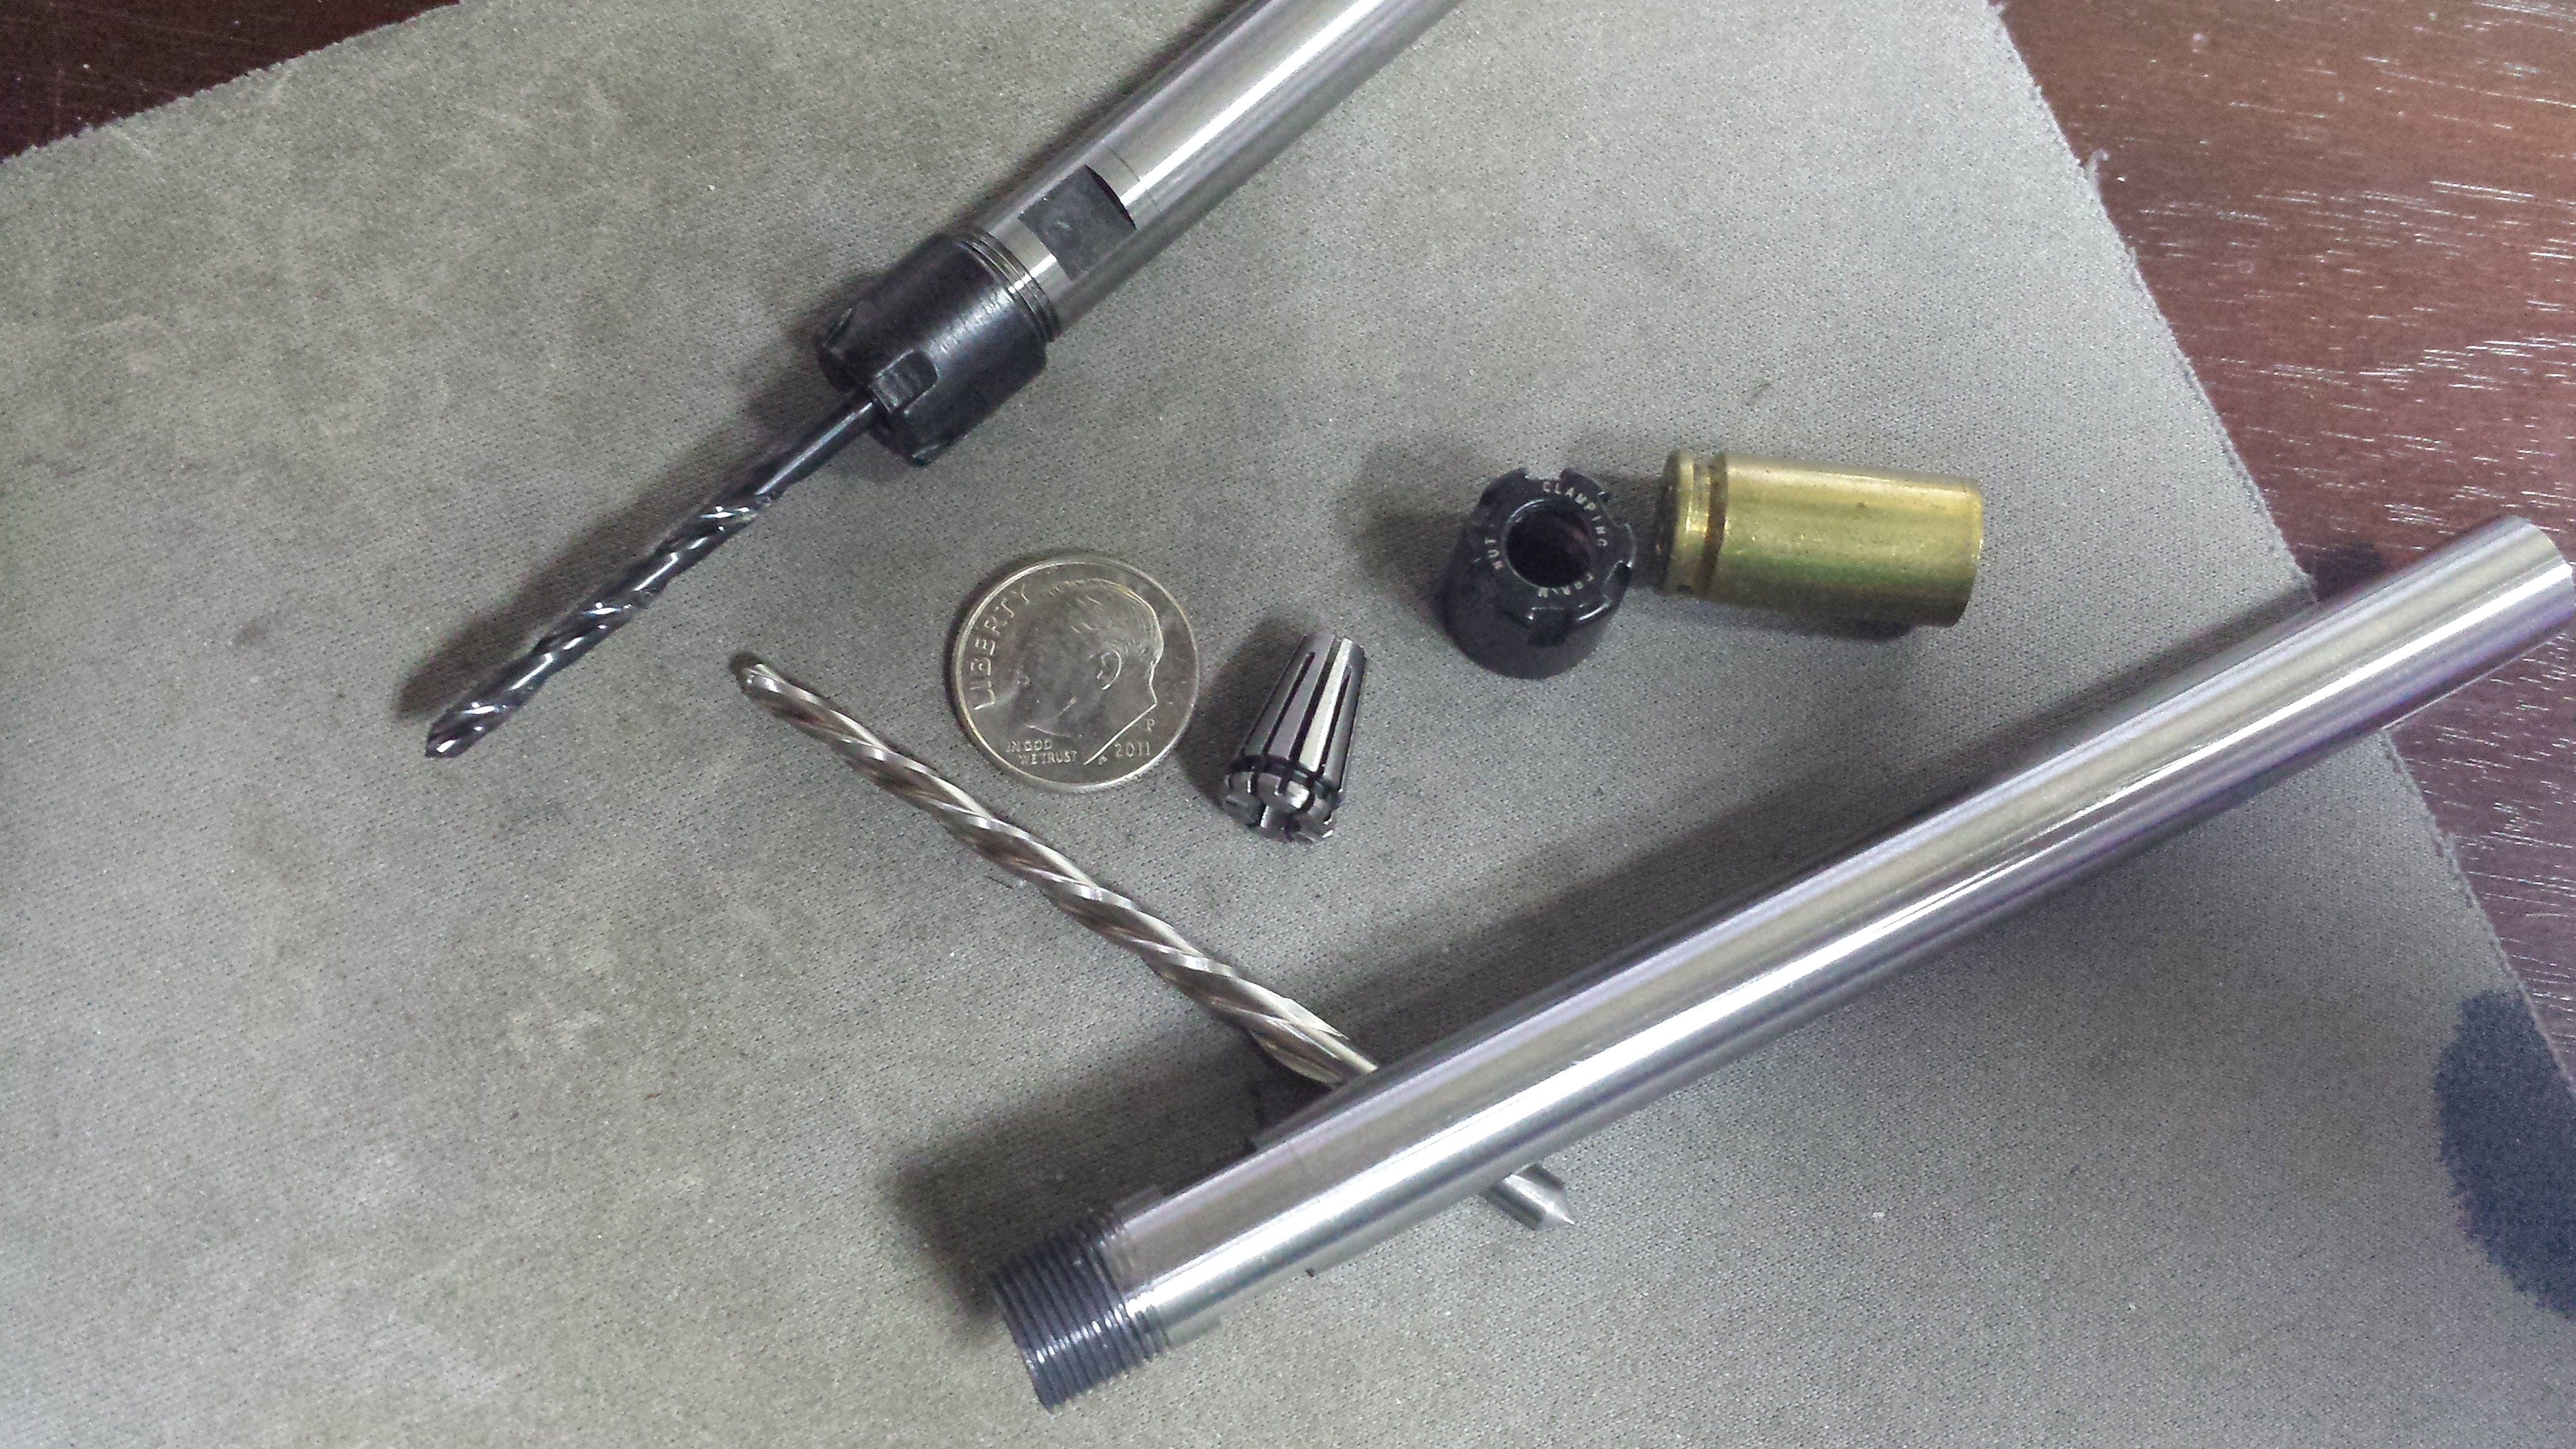
So how did it work? The fixture worked perfectly but there with a few tooling hiccups. The first time I tried to use it I went out to drill and pin a customer barrel and realized the large drill chuck I have will collide with the hand guard cap behind the gasblock. The reason being is that I have to bottom out the drill bit and the reamer in the chuck so I can measure their tool offset and it will be repeatable from then on. I also do this with common drill sizes and spot drills. With no good way to extend the length of the drill and reamer downward and maintain repeatable tool offset I would either have to do the drilling and reaming in separate operations measuring the tool offset each time or simply find another way to extend the stickout of the tools from the chuck. I searched for awhile and the best the solution seemed to be to use an ER collet tool extension. The widely available set screw type extensions are only found in standard nominal sizes (usually 0.25″) so they wouldn’t work without introducing a huge and unusable amount of run out. Settling on a colleted extension I also needed a somewhat small diameter to clear the hand guard cap. I ended up having to order the tools off of Ebay from China since I couldn’t find an equivalent tool extension domestically. This meant a long shipping time. I went with the smallest I could find which was ER8m. The m just meant they used a slimmer nut that required its own specialty wrench. These arrived and worked great when installing in the drill chuck, just like a 3/8″ drill bit would, but they are long enough to bottom out in the drill chuck for repeatability. The only problem encountered with this set up was that the the collets weren’t tight enough to hold the tools. In the case of the reamer it just simply wasn’t torqued down enough but in the case of the #31 drills the 3.5mm collet had actually reached its maximum compression and would not grip the drill bit any tighter. That of course broke both of my carbide drills trying to drill through the very hard nitrided surface of the barrel. I replaced that collet with a 3mm and it fits the drill much better. Since the proper way to pin a gasblock is to ride the edge of the barrel, meaning the center of the hole should be right on the horizon of the barrel leaving the hole exactly half way into the barrel, this means that the drill is essentially cutting through the hard nitrided surface the entire way through the barrel. This is very hard on the tool and in my case when switching to the #31 TiN coated cobalt drill and the drill chuck, even a rigidly held tool in an otherwise good cut was burned up. I need to stick to TiAlN carbide and perhaps step up the RPM and reduce the feed.
I did a lot of testing to hopefully find the perfect depth to ream to leaving only the hammering in of the pin remaining for completion. What I found after testing many dozens of pins is that the pins are not of a consistent enough size to do it this way and get the perfect depth pin every time. The pins really must be hand fit with the reamer to get a good equidistant protrusion on each side. Given that, I thought I could still use automation to my advantage and ream most of the way down and then simply finish it by hand, a strategy that worked very well despite the reamer slipping and not reaming the hole deep enough.
Fortunately the spot drilling portion of the operation went well thanks to the 140 deg. 3/8″ spot drill from Lakeshore Carbide which apparently now only come in double ended versions (just be careful seating them in the drill chuck).
![]()
Lakeshore Carbide 140deg. spot drill
The other issue was with the rigidity of the barrel during drilling. When drilling the forward leg that is unsupported the barrel tended to flex downward from the force. This was no doubt exacerbated by the fact that the drill responsible for that was the cobalt drill with the rapidly disintegrating cutting edge but it is still an issue that must not be allowed to persist. Simply placing a vertical support to hold the barrel from any downward Z movement will eliminate this problem entirely.
While waiting for the tool extensions from China to arrive I didn’t want to waste any time and had started production on the gasblocks on Dec. 16 2014 which coincidentally was the 241st anniversary of the Boston Tea Party, and just as the colonists did in 1773 we will once again find ourselves brewing up an ocean of High “T” before you know it.
If you didn’t get that reference I guess you’ll just have to stay tuned for the next installment.